Join me to crochet this Medium Skull! Today I’m sharing the pattern, along with a YouTube tutorial to help you with the visual details. So grab your yarn and let’s crochet it together! 💀🖤
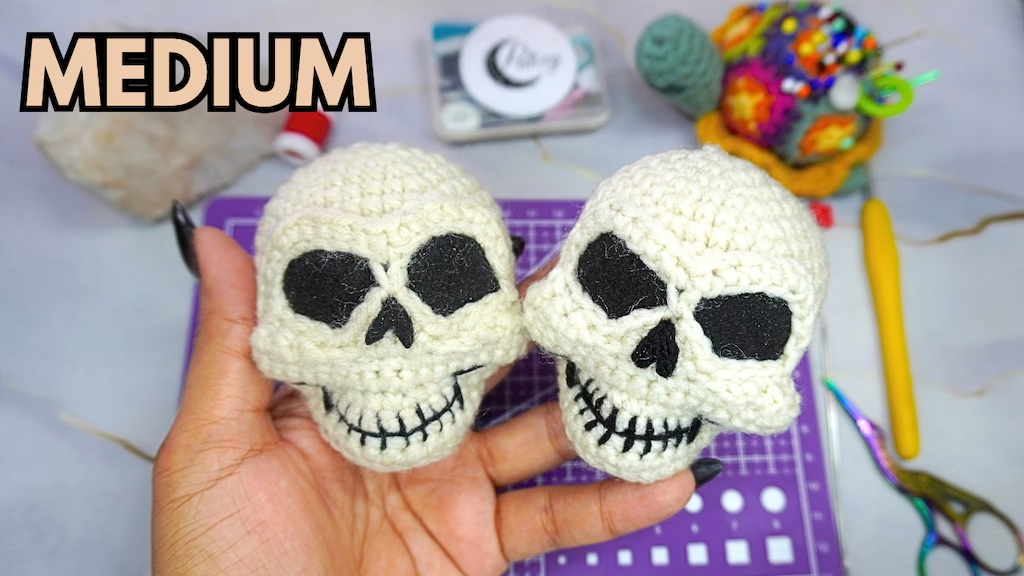
This free Medium Skull crochet pattern is perfect for anyone who loves dark, spooky, and unique amigurumi creations. It’s also a fun project for Halloween and Día de Muertos, whether you want to decorate your space or create a special handmade piece. In this post, you’ll find the written pattern and the YouTube tutorial to create your own skull with detailed features and a spooky style. Use it as a decoration, a keychain, or add a body to create your own unique crochet creature. 💀🖤
🖤 MEDIUM SKULL CROCHET PATTERN
🌜 Patixy Crochet | Patixy Creatures 🖤
Free Crochet Pattern with Step-by-Step YouTube Tutorial
Hello! 👋
Today I’m sharing this Medium Skull crochet pattern 🖤✨️
This free pattern includes a YouTube tutorial, making it easy to follow every step of the project, from the first stitches to the final assembly.
If you enjoy crocheting detailed amigurumis this pattern is perfect for you. I hope you have as much fun making this skull as I had designing it!
What will you find on this page?
🧶 Free written crochet pattern with detailed step-by-step instructions.
🎥 Complete YouTube tutorial, so you can easily follow every step of the project.
📌 IMPORTANT INFORMATION
This pattern is for personal use only.
It is not allowed to resell, redistribute, translate, publish, or claim this design as your own.
You are welcome to sell the finished product, as long as you give credit to:
Design by 🌜 Patixy Crochet 🖤
@patixy_crochet
✨ You’re currently viewing the free version of this pattern.
To make the process even easier, you can crochet along with the step-by-step YouTube tutorial while following the written instructions.
📺 VIDEO TUTORIAL CONTENT
For this tutorial, you’ll need to watch the video tutorials for visual details:
• Video Tutorial
🖤 LEVEL
Basic – Intermediate
🖤 SIZE
• Medium – 8 cm / 3.25 in approx.
💡Size may vary depending on yarn weight and hook size used.
🖤 ABBREVIATIONS
- MR = magic ring
- ch = chain
- sc = single crochet
- sl st = slip stitch
- hdc = half double crochet
- dc = double crochet
- tr = treble crochet
- dtr = double treble crochet
- inc = increase
- dec = decrease
- BLO = back loop only
- FLO = front loop only
- Puff = Puff stitch
- sts = stitches
- R / Rnd / Rnds = Round(s)
MATERIALS:
- #4 medium-weight yarn
Color: Ivory\Gray or your preferred color
- Crochet Hook 2.75mm
- Scissors
- Needles
- Pins
- Stitch Markers
- Stuffing
- Black Felt – Mix Color
- Glue
- Extras:
- Row Counter
- Measuring Tape
- Cutting Mat
🖤 MEDIUM SKULL
See the video for visual details.)
✨ HEAD
Color: bone
Rnd 1. 6 sc in a MR = 6 sts
Rnd 2. 6 inc = 12 sts
Rnd 3. (1 sc, 1 inc) × 6 = 18 sts
Rnd 4. (2 sc, 1 inc) × 6 = 24 sts
Rnd 5. (3 sc, 1 inc) × 6 = 30 sts
Rnd 6. (4 sc, 1 inc) × 6 = 36 sts
Rnd 7–14. 36 sc (8 rounds)
Rnd 15. (4 sc, 1 dec) × 6 = 30 sts
Rnd 16. (3 sc, 1 dec) × 6 = 24 sts
Rnd 17. (2 sc, 1 dec) × 6 = 18 sts
👉 Stuff very well, shaping it into a sphere and leaving a little space in the center if making the neck version.
Rnd 18. (1 sc, 1 dec) × 6 = 12 sts
✨ Neck Version
Rnd 19. 12 sc in the back loop only (BLO) = 12 sts
Rnd 20–24. 12 sc (5 rounds)
Ch 1 and fasten off.
Weave in the ends.
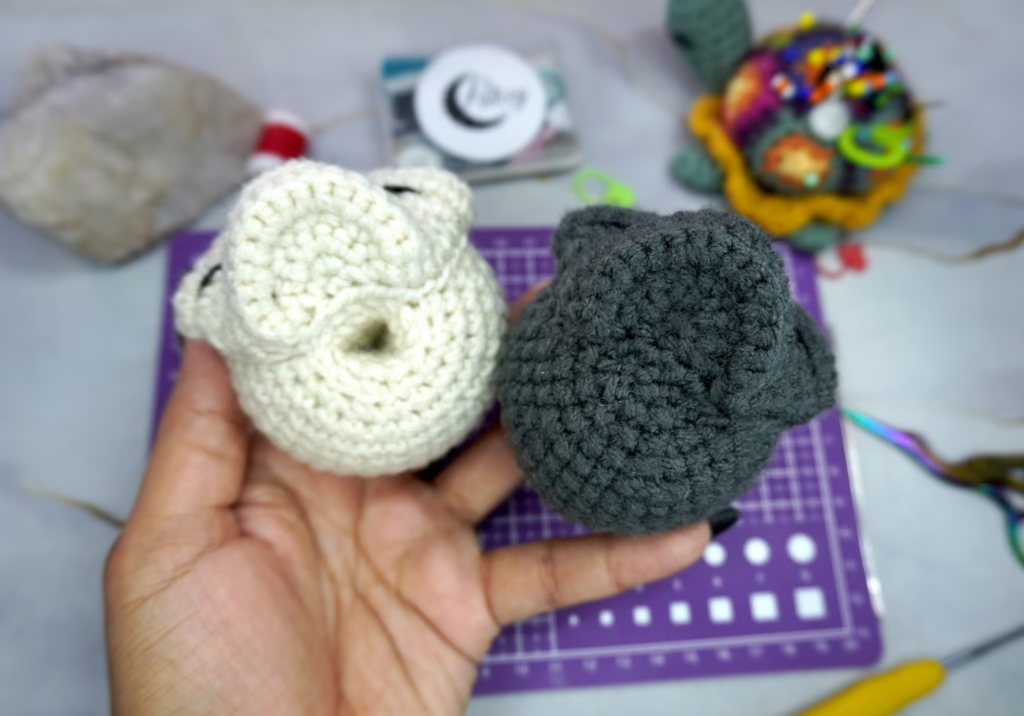
👉 Using a toothpick, insert the neck into the head, using the space left while stuffing to create the neck opening.
✨ Closed Version
Rnd 19. 6 dec = 6 sts
Ch 1 and fasten off.
👉 Close the opening by passing the yarn through the back loops of each stitch with a yarn needle, then pull to close the opening.
Weave in the ends and hide the yarn tails.
See the video for visual details.)
✨ FACE AND JAW
See the video for visual details.)
Color: bone
ROWS
Row 1. 4 sc in a MR = 4 sts
Ch 1, turn.
Row 2. 4 inc = 8 sts
Ch 1, turn.
Row 3. (1 sc, 1 inc) × 4 = 12 sts
Ch 1, turn.
Row 4. (2 sc, 1 inc) × 4 = 16 sts
Ch 1, turn.
Row 5. 16 sc in BLO = 16 sts
Ch 1, turn.
Row 6–8. 16 sc (3 rows)
Ch 1, turn.
Row 9. 3 inc, 2 sc, 1 dec, 2 sc, 1 dec, 2 sc, 3 inc = 20 sts
Ch 1, turn.
Row 10. 20 sc = 20 sts
Ch 1, turn.
Row 11. 7 sc, 1 dec, 2 sc, 1 dec, 7 sc = 18 sts
Ch 1, turn.
Row 12. 3 dec, 2 sl st, 2 inc, 2 sl st, 3 dec = 14 sts
Ch 1, turn.
Row 13. 3 sc, 2 sl st, 1 sc, (1 hdc, 1 ch, 1 hdc) in the same stitch, 1 sc, 2 sl st, 2 sc, 1 dec = 15 sts, including the chain.
Ch 1, turn.
Row 14. 8 ch (9 ch total, including the turning chain), skip 7 stitches and make 1 sc in the chain (8th ch, between the 2 hdc from the previous row), 8 ch, skip 6 stitches and make 1 sl st in the 7th stitch = 19 elements, including the chains.
Ch 1, turn.
👉 Starting in the last chain from the previous row, work across the chains, leaving the last sl st unworked.
Row 15. 3 sc, 1 inc, 4 sc, 1 sc (in the center of the face), 4 sc, 1 inc, 3 sc, 1 sl st in the back loop of the turning chain = 20 sts.
👉 Now we will work around the edge of the face.
- Along the side: Ch 1, 2 dec, 4 sc,
- Along the bottom: 2 dec,1 sc, 2 dec.
- Along the other side: 4 sc, 2 dec.
This produces 17 sts.
1 sl st in the corner
Ch 1 and fasten off, leaving enough yarn to sew the face and jaw to the skull.
🖤 ASSEMBLY
(See the video for visual details.)
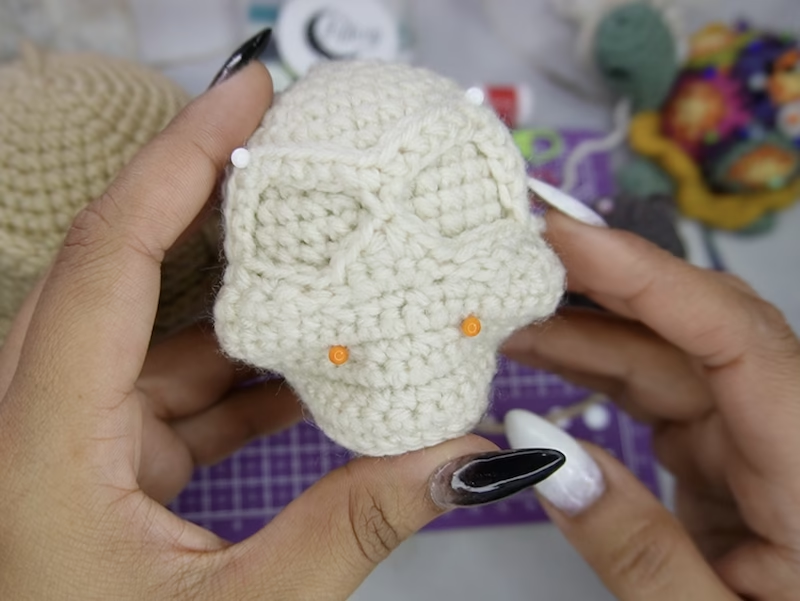
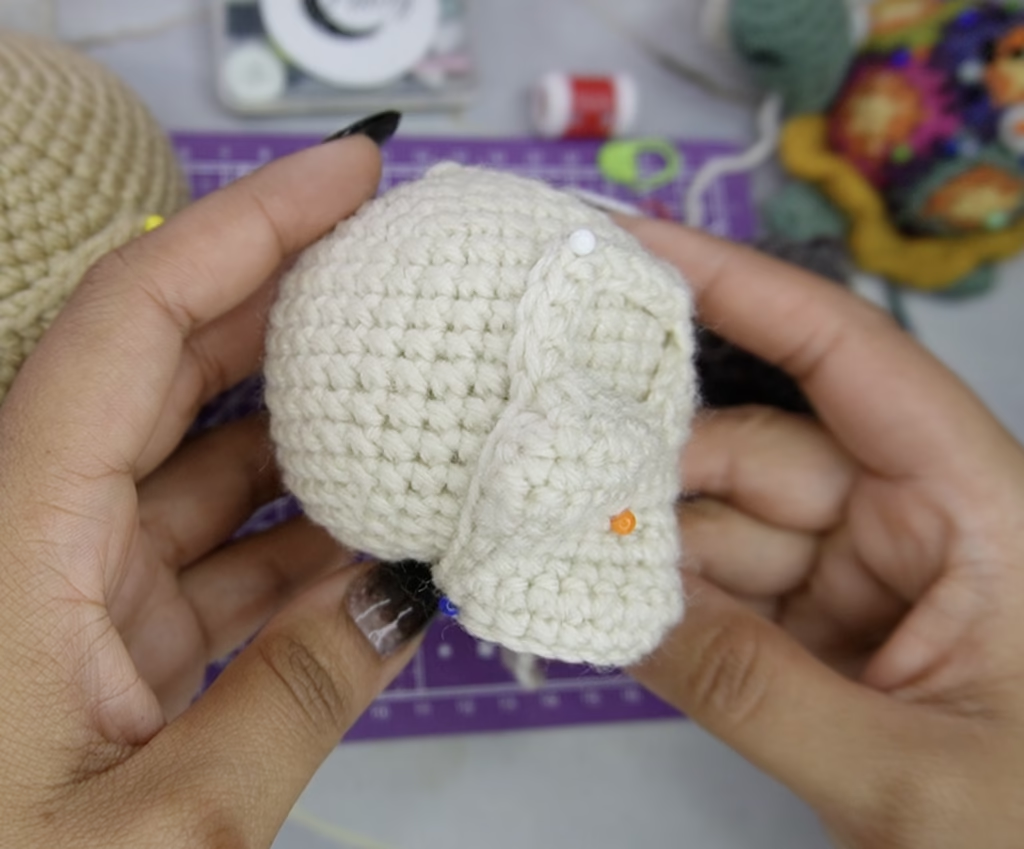
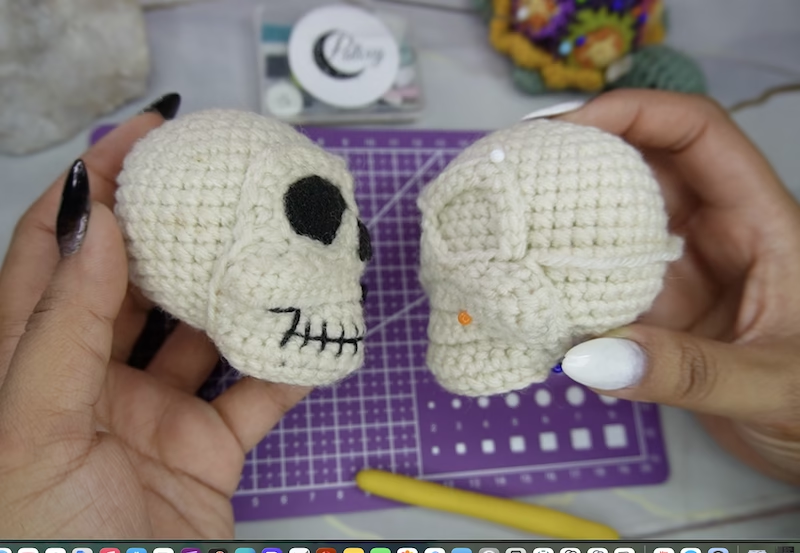
👉 Using pins, position the 6 sc along the bottom part of the jaw.
For the neck version: wrap the front half around the opening left for the neck.
For the closed version: using the last decrease round as a guide (between Rnd 18 and Rnd 19), position the 6 sts around the round.
Once the jaw is positioned:
👉 Using pins, position the brow bones below Rnd 6, which is the round with the final increases. Place them directly below, above Rnd 7. It is very important not to go above Rnd 6, so the skull’s face does not become distorted.
Secure the cheekbones in place with pins.
Mark the gums, securing them underneath the cheekbones and aligned with the center of each eye. This should be approximately between Rnd 15 and Rnd 16 of the skull.
Glue a rectangle of black felt inside the eyes to create depth in each one, then check that everything is balanced and sew the face to the head. (See video.)
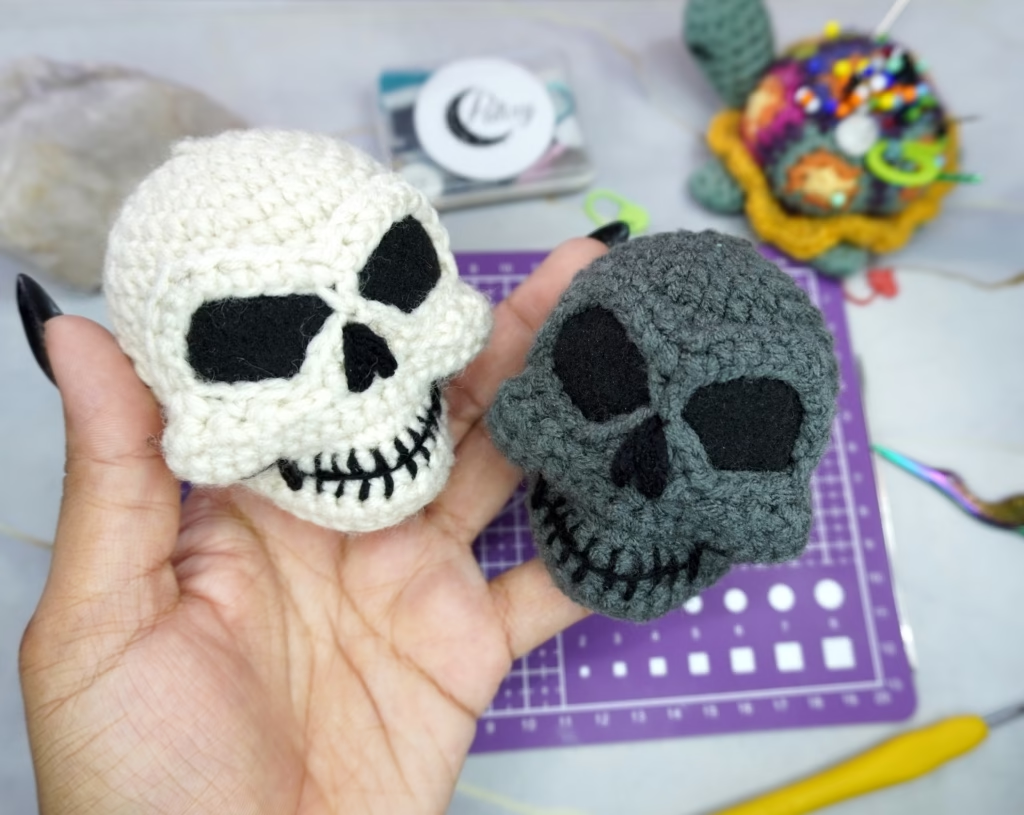
✨ FACE DETAILS
- Embroider the teeth using thin black yarn.
- Embroider the nose or add a small piece of black felt.
👉 (See the video for visual details.)
Decorate to your liking! ✨
🌜Patixy Crochet | Patixy Creatures 🖤
A World of Crochet Creatures ✨️
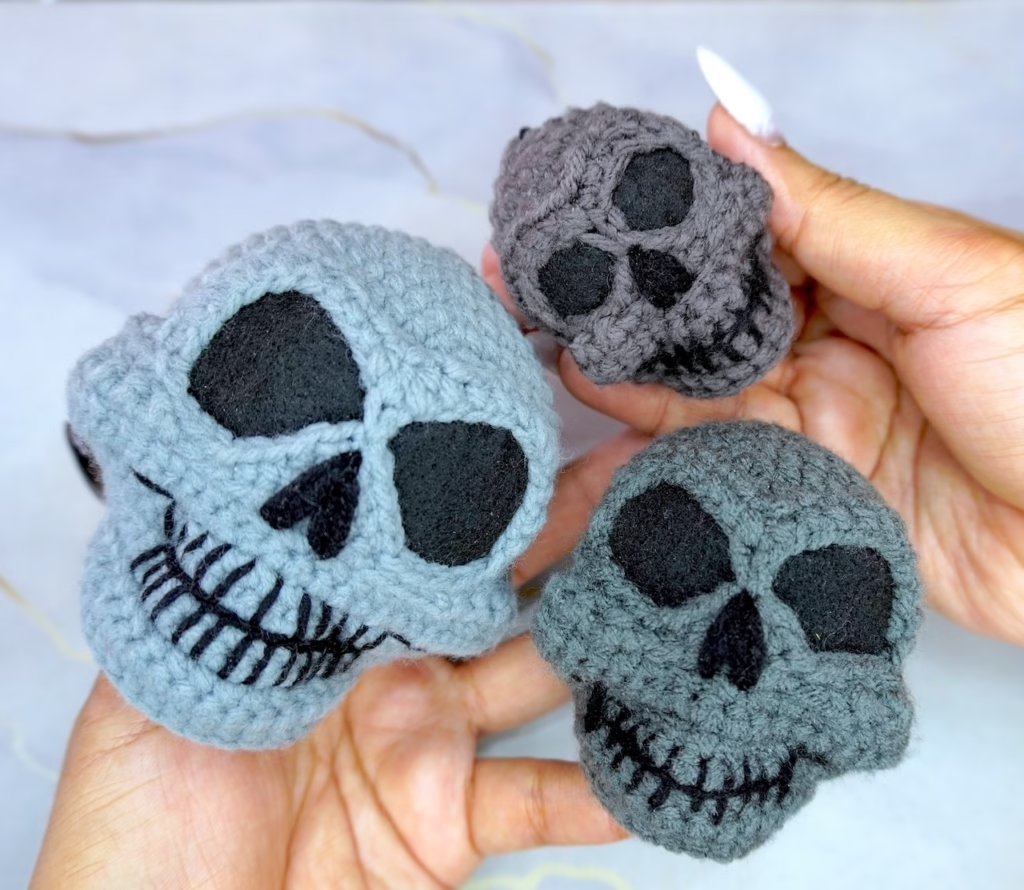
✨ FINAL RESULT
💖 I’d love to see your finished project! Don’t forget to tag me on social media: @patixy_crochet on Instagram and @PatixyCrochet on Facebook. You can also use the hashtag
#patixycrochetamigurumis.
⚠️ COPYRIGHT & USAGE
❌ NOT ALLOWED:
Copying, reproducing, or selling this pattern, in whole or in part.
✅ ALLOWED:
Selling the finished product in small quantities.
💌 Designer credit is appreciated:
@patixy_crochet.
© 2026 Patixy Crochet. All rights reserved.
An original design by Patixy Creatures,
where creatures come to life through crochet.
Most popular patterns
Looking for more creatures? 🖤
Explore premium crochet patterns with exclusive designs.
🌐 FIND ME ON SOCIAL MEDIA
📩 Have questions?
Feel free to contact me at:
Patixycrochet@patixycrochet.com
👉 Find more free patterns on my website:
Leave a Reply