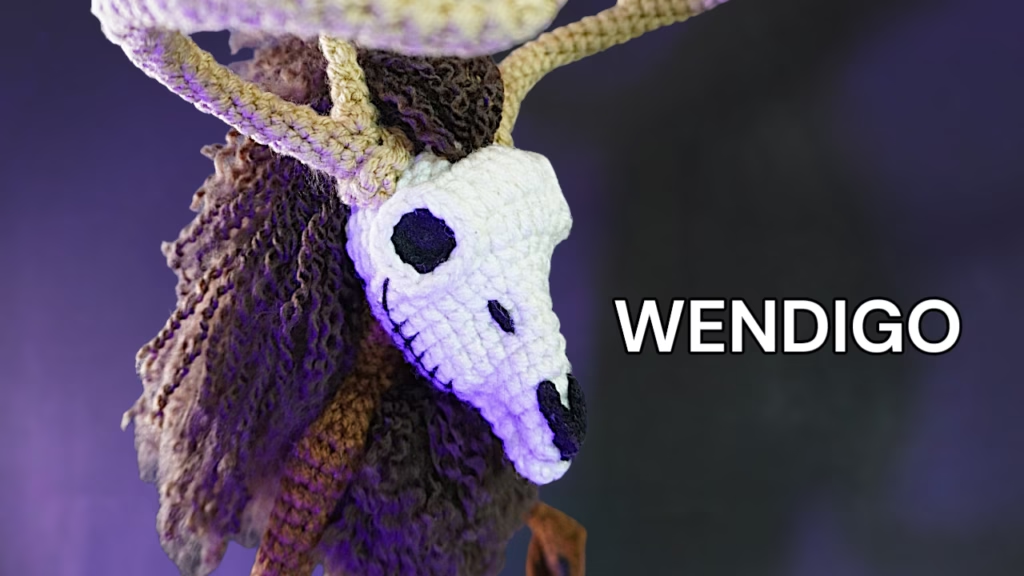
Join me to crochet The Wendigo! Today I’m sharing this pattern, along with a YouTube tutorial for the visual details. So let’s crochet him together! 🧶✨
👉 If you prefer an ad-free version, with step-by-step photos, printable format, and a more comfortable crochet experience, you can get the Premium PDF here.
This free Wendigo crochet pattern is perfect for anyone who loves dark and unique amigurumi creatures 🖤🦴. In this post, you’ll find the written pattern and the YouTube tutorial to create your own piece with special details and a mystical style. Bring this legendary creature to life and take your crochet to the next level. ✨
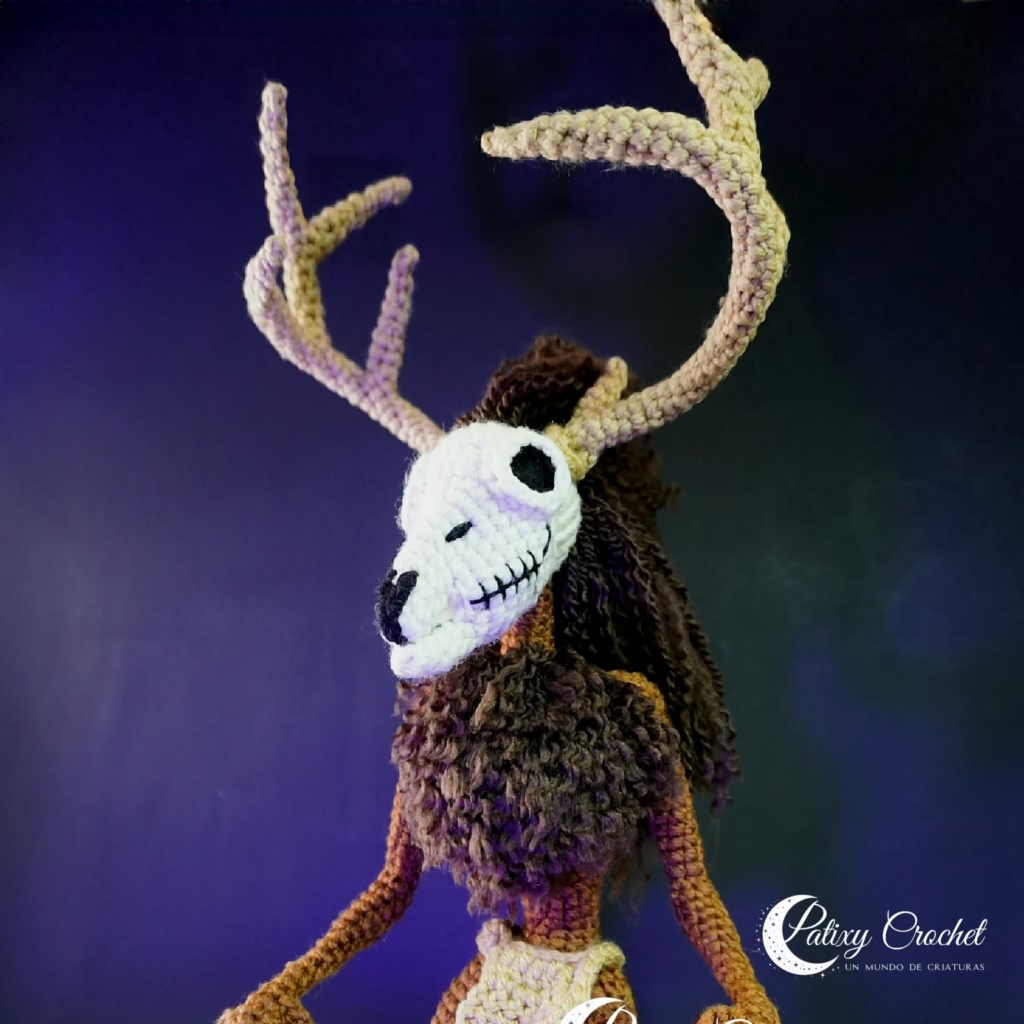
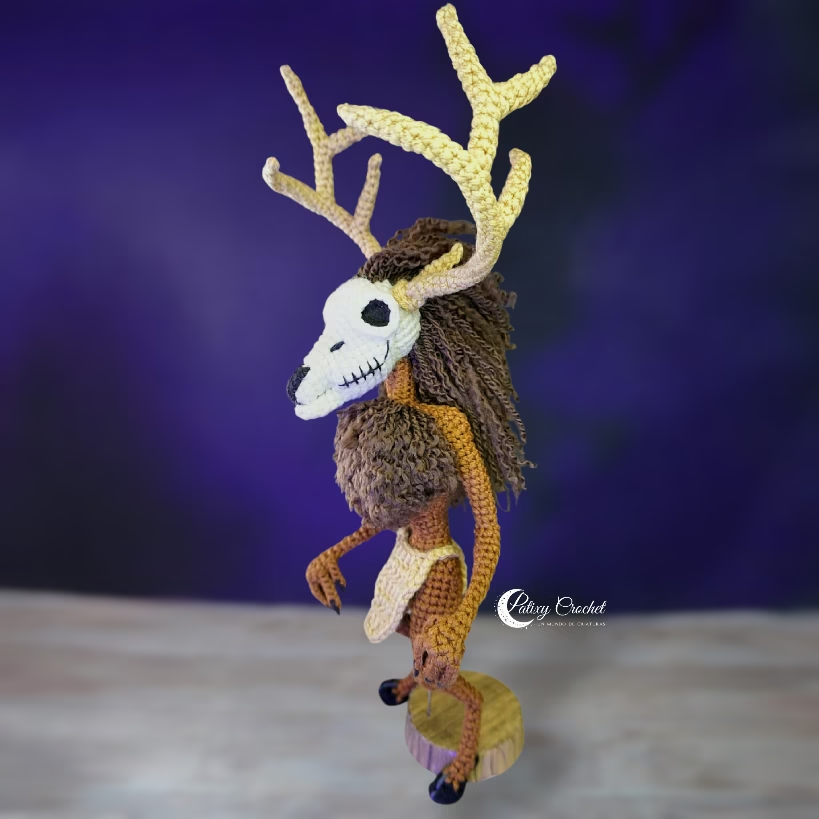
🖤 WENDIGO CROCHET PATTERN
🌜 Patixy Crochet | Patixy Creatures 🖤
Free Patter with Visual Support on YouTube
Hello! 👋
Today I’m sharing this Wendigo Amigurumi crochet pattern 🖤✨️
The pattern includes a YouTube tutorial divided into 4 parts, where you can follow the entire process step by step, including the final assembly.
It is designed for intermediate-level crocheters, perfect if you enjoy creating creatures with lots of details and personality.
📌 IMPORTANT INFORMATION
This pattern is for personal use only.
It is not allowed to resell, redistribute, or claim this design as your own.
You may sell the finished product by giving credit to:
Design by 🌜 Patixy Crochet 🖤 / @patixy_crochet
✨ Here you will find the free version of the pattern.
To make the process easier, you can also follow the visual tutorial on YouTube while you crochet.
👉 If you prefer an ad-free version, with support photos, printable format, and a more comfortable experience, you can get the Premium PDF here.
🖤 LEVEL
Intermediate – Advanced
🖤 SIZE
Aproximately 16 in / 41 cm tall
Size may vary depending on yarn weight and hook size used.
📺 VIDEO TUTORIAL CONTENT
For this tutorial, you’ll need to watch the video tutorials for visual details:
• Part 3
🖤 ABBREVIATIONS
- MR = magic ring
- ch = chain
- sc = single crochet
- sl st = slip stitch
- hdc = half double crochet
- dc = double crochet
- tr = treble crochet
- dtr = double treble crochet
- inc = increase
- dec = decrease
- BLO = back loop only
- FLO = front loop only
- Puff = Puff stitch
- sts = stitches
- R / Rnd / Rnds = Round(s)
MATERIALS:
- Worsted weight (#4) acrylic yarn in the following colors:
off-white/ivory, black, light taupe (khaki or sand), dark brown, cinnamon brown, and dark gray.
- Glue, Silicone
Extras:
🖤 PATTERN
Part 1
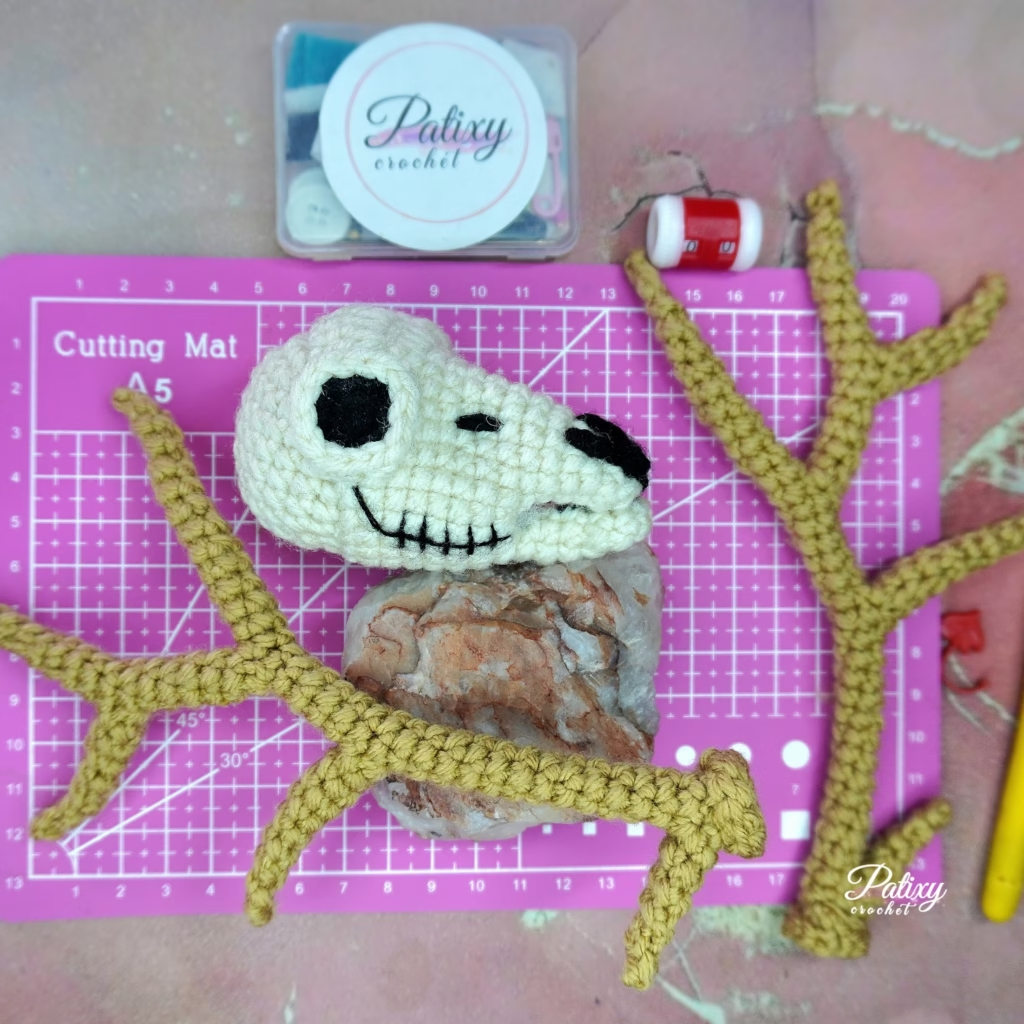
🖤 HEAD
Color: Off White,
R1. 6 sc in MR = 6 sts
R2. 6 inc = 12 sts
R3. (1 sc, 1 inc) x6 = 18 sts
R4. (2 sc, 1 inc) x6 = 24 sts
R5–R10. 24 sts (6 rounds)
R11. (2 sc, 1 dec) x6 = 18 sts
R12. (1 sc, 1 dec) x6 = 12 sts
👉 Stuff firmly, leaving a small empty space in the center for the neck.
R13. 1 dec, 5 sc, 1 dec, 3 sc = 10 sts
R14. BLO 10 sts
R15–R17. 10 sts (3 rnds)
Fasten off.
👉 Using a stick or blunt tool, insert the neck into the head through the opening left while stuffing. 📹 (See the video for visual details.)
🖤 UPPER JAW
Color: Off White
Ch 3
R1. 1 sc in 2nd ch from hook, 3 sc in last ch, 2 sc on the other side = 6 sts
R2. 6 sc
R3. 1 sc, 2 inc, 3 sc = 8 sts
R4. 2 sc, 2 inc, 4 sc = 10 sts
R5. 3 sc, 1 inc, 6 sc = 11 sts
1 sl st
Fasten off.
🖤 LOWER JAW
Color: Off White
Ch 3
R1. 1 sc in 2nd ch from hook, 3 sc in last ch, 2 sc on the other side = 6 sts
R2 – R5. 6 sts (4 rnds)
R6. 2 sc, ch 2
Do not fasten off
👉 Join both jaws: using the upper jaw, crochet 9 sc starting from the fasten-off stitch, ch 2. 📹 (See the video for visual details.)
On the lower jaw, skip 1 st and crochet 3 sc.
R7. 2 sc, 2 inc, 4 sc, 1 inc, 4 sc, 2 inc, 1 sc, 1 inc, 1 sc = 24 sts
R8. 1 sc, 1 inc, 22 sc = 25 sts
R9. 5 sc, 1 dec, 2 sc, 2 inc, 2 sc, 1 dec, 10 sc = 25 sts
R10. 10 sc, 1 inc, 2 sc, 1 inc, 11 sc = 27 sts
R11. 27 sc
R12. 9 sc, 2 sl st, 1 dc inc, 1 dc, 1 dc inc, 2 sl st, 11 sc = 29 sts
R13. 8 sc, ch 4, skip 3 sts, 1 dc, 1 dc inc, 2 dc, 1 dc inc, 1 dc, ch 4, skip 3 sts, 8 sc to end.
Fasten off.
🖤 EYE EDGES
📹 (See the video for visual details.)
Color: Off White
👉 Attach yarn with a sl st at the bottom corner of the eye opening.
Work 13 sc around each eye, join with a sl st.
Fasten off and weave in the ends.
🖤 NOSE (make 1)
Color: Black yarn
Ch 4
1 sl st in 2nd chain from hook
Ch 3
Fasten off.
🖤 HEAD ASSEMBLY
📹 (See the video for visual details.)
✨ Sew the jaw to the skull
- Lightly stuff the jaw halfway.
- Place the face onto the skull and secure it with pins before sewing, making sure it is well centered and does not cover the neck opening. Then sew it in place.
✨ Join/Sew both ends of the jaws
- Join/sew both ends of the jaws, ensuring a difference of 1 round between the upper and lower jaw. The upper jaw should be positioned slightly inward to shape it. (This helps create a more natural mouth shape.)
✨ Attach the nose to the upper jaw
- First, secure the tip between both jaws. Then position and sew the ends between rounds 4 and 5, leaving 1 stitch of space between each side.
✨ Teeth embroidery
- Mark the reference points for the teeth using pins.
- Embroider the teeth using a thin strand of black yarn, following the marked points.
- Repeat the same process on the opposite side.
✨ Nose shaping (nasal indentation)
- Place pins to mark the reference points:
- Between rounds 7 and 8, mark 2 points with a distance of 4 stitches between them.
- Between rounds 9 and 10, mark 2 points with a distance of 6 stitches between them.
💡 Make sure everything is as centered as possible.
- Using black yarn and a needle, make stitches from one side to the other, passing through the 4 marked points.
- Gently pull both ends of the yarn to create the nasal indentation.
- Bring both yarn ends to the back of the skull and fasten off.
✨ Eye sockets
- Using black felt, cut 2 circles measuring 2.5 cm (1 in).
- Apply a small amount of glue inside each eye socket.
- Place the felt circles and press gently until they are well secured.
📹 (See the video for visual details.)
💡 Make sure they are centered and properly fitted for a clean finish.
✨ And that’s it, your skull is complete!
🌜 Patixy Crochet 🖤 Patixy Creatures
Part 2
📹 (See the video for visual details.)
🖤 ANTLERS (2)
🖤 MAIN LARGE ANTLER (2)
Color: Khaki
💡 Remember to mark the beginning of each round to keep track of your stitch count.
✨️ Base
R1. 5 sc in MR = 5 sts
R2. 5 sc BLO = 5 sts
✨️ First Branch
R3. In the first stitch make 4 sc, then 4 sc = 8 sts
R4. 1 sc, skip the next 3 sc, 4 sc = 5 sts
R5 – R16. 5 sc = 5 sts (12 rnds)
✨️ Second Branch
R17. 4 sc, in the last stitch make 4 sc = 8 sts
R18. 5 sc, leave the next 3 sc unworked = 5 sts
R19. Skip the 3 unworked sc from the previous round, 5 sc = 5 sts
R20 – R23. 5 sc = 5 sts (4 rnds)
✨️ Third Branch
R24. In the first stitch make 4 sc, 4 sc = 8 sts
R25. 1 sc, skip 3 sc, 4 sc = 5 sts
R26 – R31. 5 sc = 5 sts (6 rnds)
✨️ Tip
R32. 1 dec, 3 sc = 4 sts
R33. 4 sc = 4 sts
R34. 2 sc, 1 dec = 3 sts
R35. 3 sc in FLO = 3 sts
R36. 1 dec, 1 sc in FLO = 2 sts
R37. ch 1
Fasten off.
💡 Make 2.
🖤 TIPS / HORNS OF EACH ANTLER BRANCH
📹 (See the video for visual details.)
🖤 SMALL TIP
✨️ First branch
Color: Khaki
R1. Join yarn with a sl st in the 5th stitch of R3 (after the 3 skipped stitches), work 1 sc in the same stitch, 1 sc in the first stitch of R3, 3 sc = 5 sts
💡 Continue working in a spiral
R2. 5 sc
R3. 1 dec, 3 sc = 4 sts
R4. 2 sc, 1 dec = 3 sts
R5. 1 dec, 1 sc in FLO = 2 sts
R6. ch 1
Fasten off.
🖤 MEDIUM TIP
✨️ Second branch
Color: Khaki
R1. Join yarn with a sl st in the first stitch of R18 (after the 3 skipped stitches), work 1 sc in the same stitch, 1 sc in the 5th stitch of R17. Continue with 3 sc = 5 sts
R2 – R4. 5 sc (3 rnds)
R5. 1 dec, 3 sc = 4 sts
R6. 4 sc
R7. 2 sc, 1 dec = 3 sts
R8. 3 sc in FLO
R9. 1 dec, 1 sc in FLO = 2 sts
R10. ch 1
Fasten off.
🖤 LONG TIP
✨️ Third branch
Color: Khaki
R1. Join yarn with a sl st in the 5th stitch of R24 (after the 3 skipped stitches), work 1 sc in the same stitch, 1 sc in the first stitch of R24, 3 sc = 5 sts
R2 – R6. 5 sc (5 rnds)
R7. 4 sc in the same stitch, 4 sc = 8 sts
R8. 1 sc, skip 3 sc, 4 sc = 5 sts
R9 – R10. 5 sc (2 rnds)
R11. 1 dec, 3 sc = 4 sts
R12. 4 sc
R13. 2 sc, 1 dec = 3 sts
R14. 3 sc in FLO
R15. 1 dec, 1 sc in FLO = 2 sts
R16. ch 1
Fasten off.
✨️ SMALL TIP of the third branch horn
Color: Khaki
R1. Join yarn with a sl st in the 5th stitch of R7 (after the 3 skipped stitches), work 1 sc in the same stitch, 1 sc in the first stitch of R7, 3 sc = 5 sts
R2 – R3. 5 sc (2 rnds)
R4. 1 dec, 3 sc = 4 sts
R5. 2 sc, 1 dec = 3 sts
R6. 3 sc in FLO
R7. 1 dec, 1 sc in FLO = 2 sts
R8. ch 1
Fasten off.
👉 Carefully weave in the ends, avoiding deforming the tip of each horn.
📹 (See the video for visual details.)
🖤 ANTLER BASE (2)
Ch 11
1 sl st in the second chain from hook,
9 sl st = 10 sl st total
Fasten off.
👉 sew to the base of the antler.
🖤 ANTLERS AND FUR ASSEMBLY TO THE SKULL
📹 (See the video for visual details.)
✨ Wire placement
- Mark a stitch on each side of the skull using pins, positioned 3 stitches away from the eyes and with 5 stitches of space between them.
- Measure the wire along one antler, leaving the last 4 rounds of the tip free (it is too tight to insert the wire). Bend at the base to mark the length.
- Insert the wire into the head, entering through one marked stitch and exiting through the other. Adjust and bend to mark the base of the second antler. Cut the excess to match the first. Make a small bend at each end to avoid sharp edges.
- Insert the wire into each antler, passing it through the initial magic ring until it reaches the skull. Secure with pins and sew to fix in place.
- Shape the antlers: spread the branches outward. The small branches should remain parallel to each other and oriented vertically. Shape the rest upward and slightly forward.
✨ Skull fur
- Mark 2 stitches at the back of the skull with a spacing of 4–5 stitches between them to use as a guide.
- Using dark brown yarn and a needle, attach the fur using a single stitch: pass the needle twice through the same stitch, leaving 2 strands (2 tufts) of approximately 12 cm (5 in) each.
- Work stitch by stitch, from side to side and row by row, gradually decreasing the number of tufts to form a triangular shape from the neck up to the top of the head.
- Once finished, trim in layers, guiding the fur upward. Use the length of the tufts at the nape as a reference and trim the rest. The result should be shorter at the top and gradually longer toward the bottom.
- Separate the strands and lightly brush them.
✨ Head complete!
🌜 Patixy Crochet 🖤 Patixy Creatures
Part 3
📹 (See the video for visual details.)
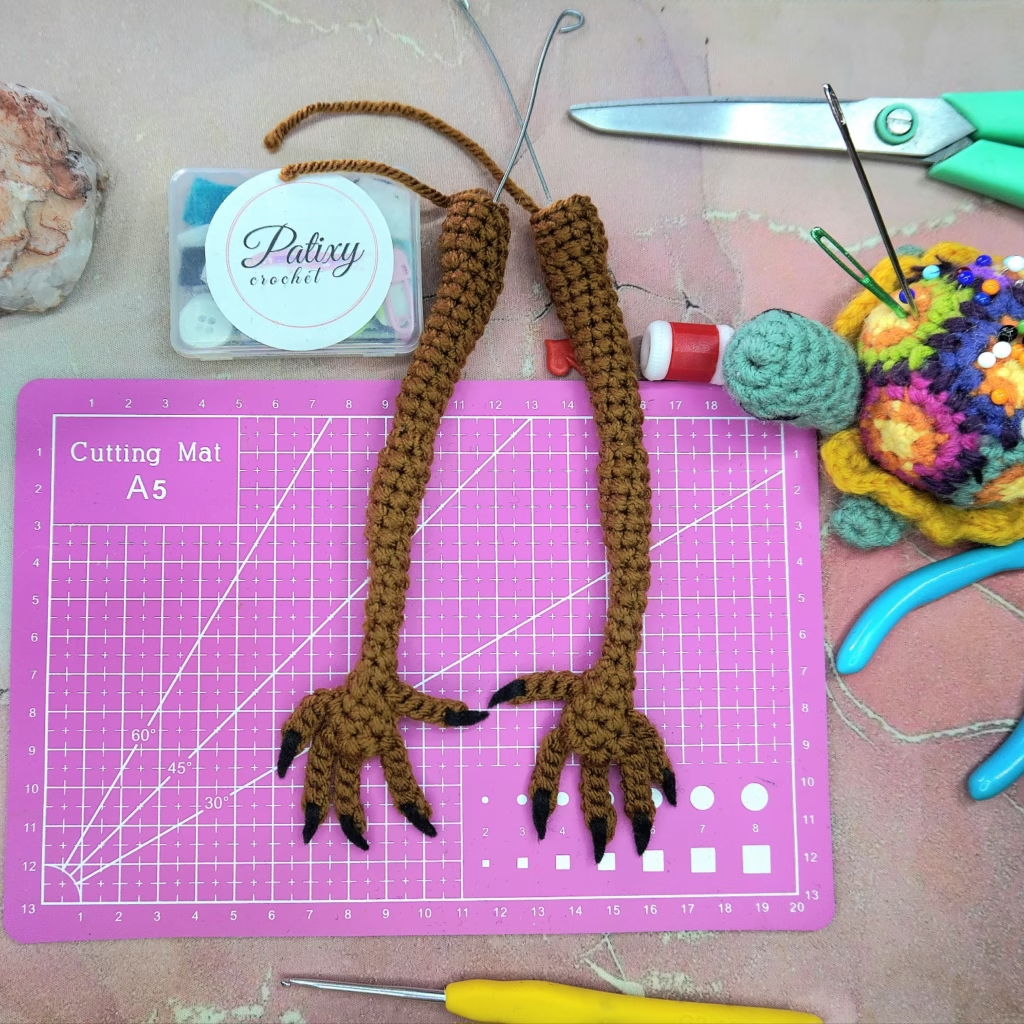
🖤 ARMS (2)
Color: Brown
Ch 3
R1. 1 sc in the second ch from hook, 3 sc in the last ch, then 2 sc along the other side of the chain = 6 sts
R2–R4. 6 sc (3 rnds)
R5. 1 sc, 1 dec, 1 sc, 1 dec = 4 sts
R6–R8. 4 sc (3 rnds)
R9. 1 sc, 1 inc, 2 sc = 5 sts
R10. 5 sc
R11. 4 sc, 1 inc = 6 sts
R12. 6 sc
R13. 2 sc, 1 inc, 3 sc = 7 sts
R14–R17. 7 sc (4 rnds)
👉 Insert a 23 cm (9 in) wire and lightly stuff only the upper, wider section.
R18. 1 dec, 2 sc, 1 dec, 1 sc = 5 sts
R19. 1 inc, 2 sc, 1 inc, 1 sc = 7 sts
R20–R23. 7 sc (4 rnds)
R24. 4 sc, 1 inc, 2 sc = 8 sts
R25–R28. 8 sc (4 rnds)
R29. 1 sc, 3 sc in same stitch, 4 sc, 1 dec = 9 sts
R30. 1 sc, 1 inc, 1 sc, 1 inc, 1 sc, 1 dec, 2 sc = 10 sts
R31. 1 sl st.
Fasten off.
👉 Lightly stuff the wider upper section.
💡 Make 2 arms.
🖤 FINGERS
📹 (See the video for visual details.)
(5 on each hand)
Color: Brown
✨ Note:
To identify the right and left hands, place both arms side by side with the fasten-off ends facing outward.
In this position:
- The arm with the fasten-off end on the right side corresponds to the right hand.
- The arm with the fasten-off end on the left side corresponds to the left hand.
This will be used only as a guide when crocheting the fingers.
👉 Fingers are made by chaining and working back along the chain with slip stitches (sl st).
When working on the chain, always start in the second chain from the hook.
• For 6-chain fingers:
Ch 6, 5 sl st starting in the second chain from the hook, 1 sl st into the hand.
• For 5-chain fingers:
Ch 5, 4 sl st starting in the second chain from the hook, 1 sl st into the hand.
🖤 RIGHT HAND FINGERS
📹 (See the video for visual details.)
👉 Take the arm that will be the right hand (the fasten-off end should be on the right side) and begin the first finger on the right side.
THUMB
Between rnds 3 and 4, attach yarn with 1 sl st,
Ch 5,
4 sl st starting in the second ch from hook,
1 sl st into the hand.
✨️ INDEX
Move up with 2 sl st to between rnds 1 and 2 of the hand,
Ch 6,
5 sl st starting in the second ch from hook,
1 sl st into the hand.
✨️ MIDDLE
1 sl st in the next stitch,
Ch 6,
5 sl st starting in the second ch from hook,
1 sl st into the hand.
✨️ RING
1 sl st in the next stitch,
Ch 6,
5 sl st starting in the second ch from hook,
1 sl st into the hand.
✨️ PINKY
Move down between rnds 2 and 3, make 1 sl st,
Ch 5,
4 sl st starting in the second ch from hook,
1 sl st into the hand.
Ch 1, and fasten off, and weave in the ends.
🖤 LEFT HAND FINGERS
📹 (See the video for visual details.)
👉 Take the arm that will be the left hand (the fasten-off end should be on the left side) and begin the first finger on the right side.
✨️ PINKY
Between rnds 2 and 3, attach yarn with 1 sl st,
Ch 5,
4 sl st starting in the second ch from hook,
1 sl st into the hand.
✨️ RING
1 sl st between rnds 1 and 2 of the hand,
Ch 6,
5 sl st starting in the second ch from hook,
1 sl st into the hand.
✨️ MIDDLE
1 sl st in the next stitch,
Ch 6,
5 sl st starting in the second ch from hook,
1 sl st into the hand.
✨️ INDEX
1 sl st in the next stitch,
Ch 6,
5 sl st starting in the second ch from hook,
1 sl st into the hand.
✨️ THUMB
Move down with 2 sl st to between rnds 3 and 4,
Ch 5,
4 sl st starting in the second ch from hook,
1 sl st into the hand.
Ch 1 and fasten off.
🖤 NAILS
📹 (See the video for visual details.)
Cut 2 strips of black felt, each 10 cm long, or 1 strip of 20 cm, with a width of approximately 3 mm (slightly thinner than the finger).
✨ For each finger:
- Insert one end of the felt into the second opening of the finger, from the inside.
- Measure a length of about 1 to 1.5 cm and trim the excess felt.
- Repeat this process on all fingers.
- Shape each nail by cutting the felt into a pointed tip, making them long and defined.
- Secure each nail to the fabric by applying glue on both sides to ensure they stay in place.
💡 Repeat the same process on the other hand.
🌜 Patixy Crochet 🖤 Patixy Creatures
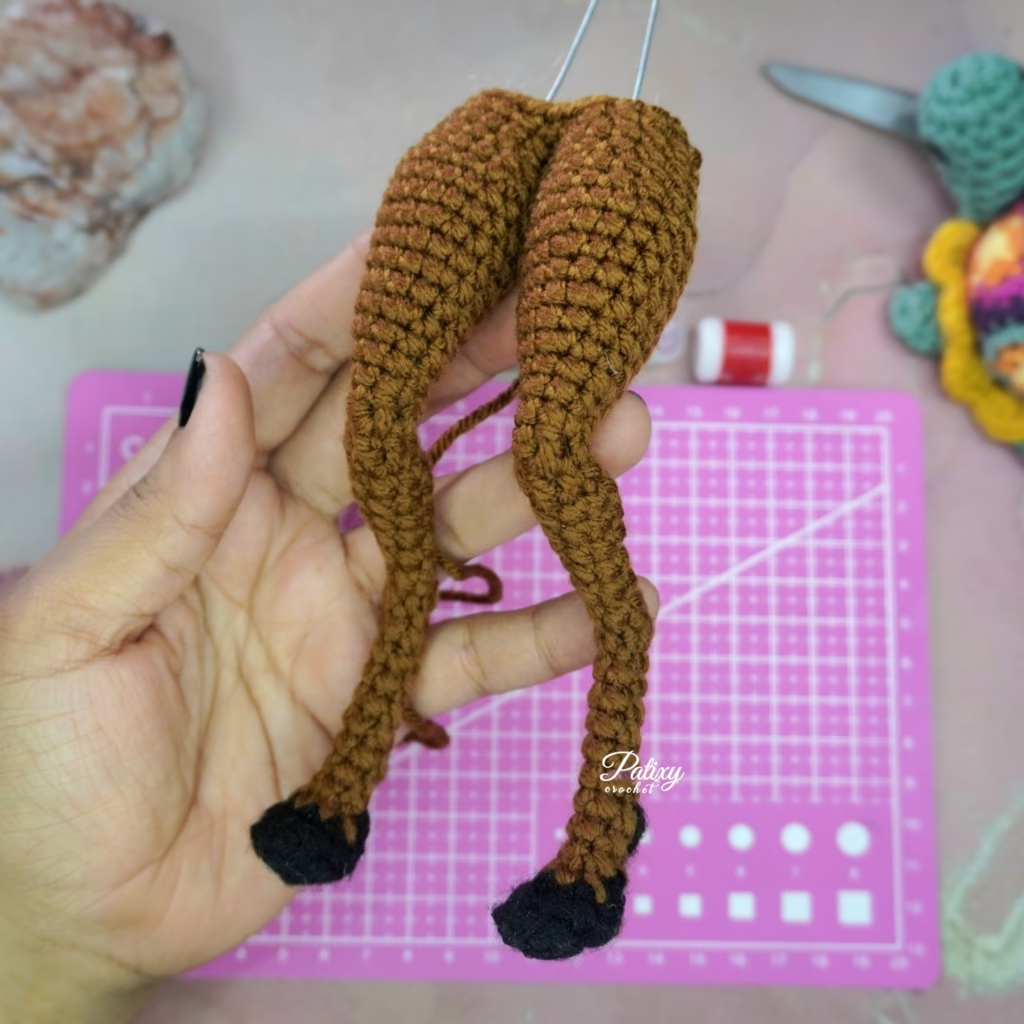
🖤 LEGS (2)
Colors: Black (Dark gray) and brown.
Black
R1. In MR, 6 sc
R2. 6 inc = 12 sts
R3. BLO: (2 sc, 1 dec) × 3 = 9 sts
👉 Change to brown without fastening off the black color.
R4. (1 sc, 1 dec) × 3 = 6 sts
R5. 1 sc, 1 dec, 3 sc = 5 sts
R6. 4 sc, change to black color and make 1 puff stitch with 3 loops, change back to brown to close the puff.
👉 Continue working with brown. Cut the black color.
R7–R12. 5 sc (6 rnds)
R13. 2 sc, 3 sl st = 5 sts
R14. 3 dc, 2 sl st = 5 sts
👉 Insert a 30 cm (12 in) wire inside the leg, bending one end to form the base of the hoof and the other end to prevent sharp edges. Shape the wire to match the leg.
R15. 5 sc
R16. 1 sc, 1 inc, 3 sc = 6 sts
R17. 6 sc
R18. 2 sc, 2 inc, 2 sc = 8 sts
R19–R20. 8 sc (2 rnds)
R21. 3 sc, 2 dec, 1 sc = 6 sts
R22. 2 dc, 1 sc, 3 sl st = 6 sts
R23. 2 dc, 3 sl st, 1 sc = 6 sts
👉 Lightly stuff the wider section and bend the wire backward following the natural shape of the leg.
R24. (1 inc, 1 sc) × 3 = 9 sts
R25. 9 sc
R26. 1 inc, 3 sc, 1 inc, 4 sc = 11 sts
R27. 3 sc, 1 inc, 7 sc = 12 sts
R28. 1 sc, 1 inc, 5 sc, 1 inc, 4 sc = 14 sts
R29. 4 sc, 1 inc, 9 sc = 15 sts
R30. 2 sc, 1 inc, 7 sc, 1 inc, 4 sc = 17 sts
R31. 7 sc, 1 inc, 9 sc = 18 sts
R32–R33. 18 sc (2 rnds)
R34. 6 sc, 1 dec, 10 sc = 17 sts
R35. 2 sc, 1 dec, 7 sc, 1 dec, 4 sc = 15 sts
R36. 5 sc, 1 dec, 8 sc = 14 sts
R37.
Left leg: 3 sc, ch 1. Fasten off.
Right leg: 4 sc. Do not fasten off ( Continue from here to make the body.)
💡 From here we will begin the body.
🌜 Patixy Crochet 🖤 Patixy Creatures
Part 4
📹 (See the video for visual details.)
🖤 BODY
Color: Brown
R1. Without fastening off the right leg, take the left leg and insert your hook into stitch 11 of round 36 of that leg (this will mark the beginning of round 1).
Crochet 14 sc on that leg, and 14 sc on the right leg = 28 sts in total
DECREASES
R2. (2 sc, 1 dec) x 7 = 21 sts
👉 Stuff the legs.
R3. (5 sc, 1 dec) x 3 = 18 sts
R4. (4 sc, 1 dec) x 3 = 15 sts
R5. (3 sc, 1 dec) x 3 = 12 sts
R6. 12 sc
BODY SHAPING
R7. 5 sc, 1 inc, 1 dec, 1 inc, 3 sc = 13 sts
R8. 5 sc, 1 inc, 3 sc, 1 inc, 3 sc = 15 sts
R9. 15 sc
R10. 5 sc, 2 inc, 1 sc, 1 dec, 1 sc, 2 inc, 2 sc = 18 sts
R11. 6 sc, 2 inc, 1 sc, 1 dec, 2 sc, 2 inc, 3 sc = 21 sts
R12. 8 sc, 2 inc, 1 sc, 1 dec, 2 sc, 2 inc, 4 sc = 24 sts
R13. 11 sc, 1 inc, 2 sc, 1 dec, 1 sc, 1 inc, 6 sc = 25 sts
R14. 2 sc, 1 inc, 22 sc = 26 sts
R15. 1 sc, 1 inc, 2 sc, 1 inc, 21 sc = 28 sts
STRAIGHT
R16. 28 sc
R17. 4 sc, 1 inc, 23 sc = 29 sts
R18 – R21. 29 sc (4 rnds)
👉 Stuff the body, making sure to keep the wire centered to prevent deformation.
✨️ JOIN ARMS
📹 (See the video for visual details.)
R22.
5 sc, 1 inc, 6 sc = 13 sts
👉 Take the left arm and, starting from the fasten-off stitch, work 10 sc on the arm separately (these stitches are not worked together with the body).
Then work 15 sc on the body.
👉 Take the right arm and, starting from the fasten-off stitch, work 10 sc on the arm separately (these stitches are not worked together with the body),
2 sc on the body = 50 sts total.
R23. 50 sc
R24. 13 sc, 5 dec, 14 sc, 5 dec, 3 sc = 40 sts
R25. 20 dec = 20 sts
📹 (See the video for visual details.)
👉 Stuff the body and shoulders. Bend the arm wires to form the shoulders and secure them to the central body wire to create the neck structure.
👉 Evenly wrap a small amount of stuffing around the neck wire and cover it with paper tape to secure the structure and prevent shifting.
R26. 10 dec = 10 sts
🖤 NECK
R27. 2 dec, 6 sc = 8 sts
R28 – R40. 8 sc (13 rnds)
R41. 4 dec = 4 sts
Fasten off.
🖤 CLOTHING
📹 (See the video for visual details.)
Color: Khaki / Sand
👉 We will work in rows.
Ch 30
Make 6 sl st starting in the second chain from the hook
Row 1. Ch 2, 6 dc = 6 sts
Row 2. Ch 2, turn, 1 dec, 4 dc = 5 sts
Row 3. Ch 2, turn, 5 dc = 5 sts
Row 4. Ch 2, turn, 1 dec, 1 dc, 1 dec = 3 sts
Row 5. Ch 2, turn, 3 dc = 3 sts
👉 Crochet 10 sc along the side of the rows until you reach the chains, then make 5 sl st on the chains.
Repeat:
Row 1. Ch 2, 6 dc = 6 sts
Row 2. Ch 2, turn, 1 dec, 4 dc = 5 sts
Row 3. Ch 2, turn, 5 dc = 5 sts
Row 4. Ch 2, turn, 1 dec, 1 dc, 1 dec = 3 sts
Row 5. Ch 2, turn, 3 dc = 3 sts
👉 Crochet 10 sc along the side of the rows until you reach the chains,
then make 6 sl st on the chains.
Fasten off.
🖤 FINAL ASSEMBLY
📹 (See the video for visual details.)
✨ CHEST FUR
👉 Using dark brown yarn and a needle, attach the fur using a single stitch: pass the needle twice through the same stitch, leaving 2 strands (2 tufts) of approximately 5 cm (2 in) each.
👉 Work stitch by stitch, from side to side for 4 rows, then gradually decrease the number of tufts on the sides to form a triangular shape that goes from the underarms down to the abdomen, finishing with 1–2 pairs of tufts.
👉 Once finished, trim in layers, guiding the fur upward.
- Separate the strands and lightly brush.
✨ Sew the clothing (loincloth) around the waist.
✨ HOOF LINE DETAIL
📹 (See the video for visual details.)
👉 Using dark gray yarn, outline the middle of each hoof to create the separation.
👉 Place the head onto the body, inserting it halfway into the neck and adjusting the opening so it fits properly.
👉 Shape the body by slightly curving it forward.
🌜 Patixy Crochet | Patixy Creatures 🖤
Congratulations!
You are done! 👏
✨ FINAL RESULT
💖 I’d love to see your finished project! Don’t forget to tag me on social media: @patixy_crochet on Instagram and @PatixyCrochet on Facebook. You can also use the hashtag
#patixycrochetamigurumis.
⚠️ COPYRIGHT & USAGE
❌ NOT ALLOWED:
Copying, reproducing, or selling this pattern, in whole or in part.
✅ ALLOWED:
Selling the finished product in small quantities.
💌 Designer credit is appreciated:
@patixy_crochet.
© 2026 Patixy Crochet. All rights reserved.
An original design by Patixy Creatures,
where creatures come to life through crochet.
Looking for more creatures? 🖤
Explore premium crochet patterns with exclusive designs.
🌐 FIND ME ON SOCIAL MEDIA
📩 Have questions?
Feel free to contact me at:
Patixycrochet@patixycrochet.com
👉 Find more free patterns on my website:
Leave a Reply