
Join me in crocheting KRAMPUS crochet amigurumi! This character, half demon and half goat, comes from Alpine folklore—the other side of Saint Nicholas.
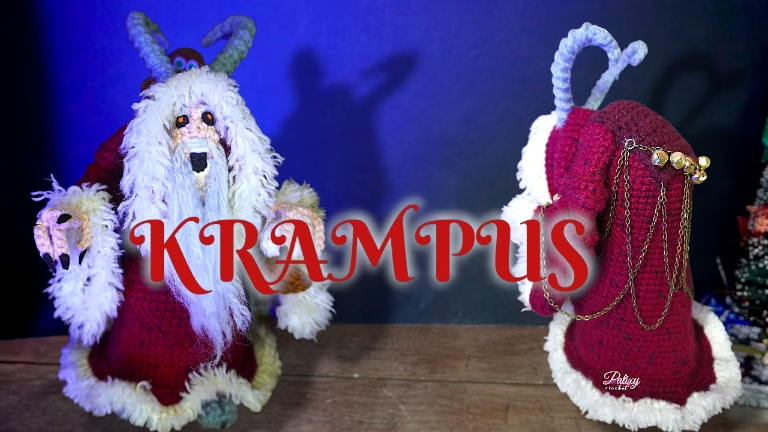
According to tradition, children are told that Krampus comes to punish them, either whipping them with branches or carrying them away in his sack.
KRAMPUS CROCHET AMIGURUMI
Eng 🇺🇲
@patixy_crochet
Free Pattern – Amigurumi
Hello! 👋Today I’m sharing this KRAMPUS Amigurumi crochet pattern.This pattern includes a 4-part YouTube tutorial in Spanish, where you can follow the process step by step, including the final assembly.This pattern is designed for crocheters with basic to intermediate crochet skills.
📺 VIDEO TUTORIAL CONTENT
For this tutorial, you’ll need to watch the video tutorials for visual details:
📌 IMPORTANT INFORMATION
This is a free pattern for personal use only.
⚠️For this tutorial you will need to know some of the basic crochet stitches:
MR = magic ring
ch = chain
sc = single crochet
sl st = slip stitch
hdc = half double crochet
dc = double crochet
tr = treble crochet
dtr = double treble crochet
inc = increase
dec = decrease
BLO = back loop only
FLO = front loop only
Puff = Puff stitch
NIVEL – TAMAÑO
- Difficulty level: Intermediate
- Size: 9 in / 23 cm approx.
MATERIALS:
- Yarn: Acrylic yarn #4; Burgundy, dark wine, off-white, pale pink, light gray, dark gray, brown, black, white.
- Pins:
- Recycled plastic circle (base size)
- Chains: 2 of 30 in or 1 of 60 in, and 1 of 4 in
- Metal rings
- Small jingle bells
- Glue
Extras:
…. Part # 1 …..
BODY:
-Burgendy,
1. 5 sc in a Mg,
2. 5 inc = 10 sc
3. (1 sc, 1 inc)x 5 = 15 sc
4. (2 sc. 1 inc) x 5 = 20 sc
5. (3 sc, 1 inc) x 5 = 25 sc
6 . (4 sc, 1 inc) x 5 = 30 sc
7. 17 sc, 1 inc, (2 sc, 1 inc)x2, 6 sc = 33 sc
8. 18 sc, 1 inc, (3 sc, 1 inc) x 2, 5 sc, 1 inc = 37 sc
9. 11 sc, 1 inc, 7 sc, 1 inc, (4 sc, 1 inc) x 2, 7 sc = 41 sc
10. 21 sc, 1 inc, (5 sc, 1 inc) x 2, 7 sc = 44 sc
11 – 20. 44 sc (10r)
21. 5 sc, 1 dec, 37 sc = 43 sc
22. 5 sc, 1 dec, 36 sc = 42 sc
23. 5 sc, 1 dec, 12 sc, 1 dec, 6 sc, 1 inc, 5 sc, 1 dec, 7 sc = 40 sc
24. 40 sc
25. 4 sc, 1 inc, 3 sc, 1 inc, 10 sc, 1 inc, 5 sc, 2 inc, 5 sc, 1 inc, 7 sc = 46 sc
26. 4 sc, 1 inc, 5 sc, 1 inc, 35 sc = 48 sc
27. 48 sc
28. 4 sc, 1 inc, 7 sc, 1 inc, 18 sc, 1 inc, 1 sc, 1 inc, 14 sc = 52 sc
29. 4 sc, 1 inc, 9 sc, 1 inc, 37 sc = 54 sc
30. 54 sc
31. 4 sc, 1 inc, 11 sc, 1 inc, 19 sc, 1 inc, 2 sc, 1 inc, 14 sc = 58 sc
32. 4 sc, 1 inc, 13 sc, 1 inc, 39 sc = 60 sc
33. 60 sc
34. 4 sc, 1 inc, 15 sc, 1 inc, 20 sc, 1 inc, 3 sc, 1 inc, 14 sc = 64 sc
35. 64 sc
36. 64 sc
37. 5 sc, 1 dec, 14 sc, 1 dec, 21 sc, 1 inc, 4 sc, 1 inc, 14 sc = 64 sc
38. 5 sc, 1dec, 12 sc, 1 dec, 43 sc = 62 sc
39. 5 sc, 1 dec, 10 sc, 1 dec, 10 sc, 1 dec, 22 sc, 1 dec, 7 sc = 58 sc
40. 27 sc, 1 dec, 9 sc, 1 inc, (2 sc, 1 inc) x 2, 4 sc, 1 dec, 7 sc = 59 sc
41. 59 sc
42. 59 sc
43. 38 sc, 1 inc, (3 sc, 1 inc) x 2, 12 sc = 62 sc
44. 4 sc, 1 inc, 13 sc, 1 inc, 43 sc = 64 sc
45. 64 sc
46. 26 sc, 1 dec, 13 sc, 1 inc, (4 sc, 1 inc) x 2, 7 sc, 1 dec, 3 sc = 65 sc
47. 4 sc, 1 inc, 15 sc, 1 inc, 44 sc = 67 sc
Fasten off.
BODY BASE:
-Burgundy,
1. 8 sc in mg,
2. 8 inc = 16 sc
3. (1 sc, 1 inc) x 8 = 24 sc
4. (2 sc, 1 inc) x 8 = 32 sc
5. (3 sc, 1 inc) x 8 = 40 sc
6. (4 sc, 1 inc) x 8 = 48 sc
7. (5 sc, 1 inc) x 8 = 56 sc
8. 16 sc, 1 inc, (3 sc, 1 inc) x 2, 16 sc, 1 inc, 13 sc, 1 inc = 61 sc
9. 22 sc, 1 inc, 22 sc, 1 inc, 14 sc, 1 inc = 64 sc
10. 23 sc, 1 inc, 23 sc, 1 inc, 15 sc, 1 inc = 67 sc
Stuff with Stuffing.
-Cut a circle of plastic smaller than the base and place it between the body and the base for support.
-With burgundy, join the base to the body by working 67 slip stitches through the back loop of the body. (67)
-Working through the front loop of the body:
Burgundy,
1. 4 sc, 1 inc, (2 sc, 1 inc) x 2, 7 sc, 1 inc, (2 sc, 1 inc) x 2, 6 sc, 1 inc, (2 sc, 1 inc) x 10, 5 sc = 84 sc
2. 5 sc, 1 inc, (3 sc, 1 inc) x 2, 8 sc, 1 inc, (3 sc, 1 inc) x 2, 7 sc, 1 inc, (3 sc, 1 inc) x 3, (3 sc, 3 sc together) x 3, (3 sc, 1 inc) x 4, 5 sc = 104 sc
3. With opaque white, work on Blo; 104 slst around.
Fasten off.
LEGS/HOOVES (2):
gray, black,
1. 6 sc in a magic ring,
2. 6 inc = 12 sc
3. BLO; 12 sc
4. 5 sc, 1 dec, 5 sc = 11 sc
5. 11 sc
Fasten off.
(See video)
– With black yarn, embroider a line down the middle of the hoof.
– Sew the hooves to the base of the body, on the front, aligned with the knees, until it stands up on its own.
(See video for visual details).
.……. # 2 ……..
SLEEVES:
- We will work in joined rounds.
– Red Burgundy,
1. 6 sc in mg,1 sl st to close, 1 ch,
2. 6 inc = 12 sc1 sl st to close, 1 ch,
3 – 6. 12 sc (4r)1 sl st to close, 1 ch,
7. (3 sc, 1 inc) x 3 = 15 sc
1 sl st to close, 1 ch,
8. 15 sc,1 sl st to close, 1 ch,
9. (4 sc, 1 inc) x 3 = 18 sc
1 sl st to close, 1 ch,
10. 3 sl st, 4 sc, 1 hdc, 1 inc dc, 1 hdc, 4 sc, 4 sl st = 19 sc
1 sl st to close, 1 ch,
11. IN FLO; 4 sl st, 11 sc, 4 sl st = 19 sc
1 sl st to close, 1 ch,
12. In BLO of R10; 4 sl st, 3 sc, 5 hdc, 3 sc, 4 sl st = 19 s
1 sl st to close, 1 ch,
13. FLO; 4 sl st, 11 sc, 4 sl st = 19 sc
1 sl st to close, 1 ch,
14. In BLO of R12; 4 sl st, 4 sc, 1 hdc, 1 inc hdc, 1 hdc, 4 sc, 4 sl st = 20
1 sc to close, 1 ch,
15. BLO; 4 sl st, 4 sc, 1 hdc, 2 dc, 1 hdc, 4 sc, 4 sl st = 20
1 sl st to close, 1 ch,
16. BLO 4 sl st, 4 sc, 1 hdc, 1dc, 1 dc inc, 1 dc, 1 hdc, 4 sc, 3 sl st = 21
1 sl st to close, 1 ch,
17. *FLO 4 sl st, 7 sc, 1 inc, 6 sc, 3 sl st = 22
1 sl st to close, 1 ch,
18. In BLO of 16R; 4 sl st, 4 sc, 2 hdc, 1 inc dc, 2 hdc, 4 sc, 4 sl st = 22
1 sl st to close, 1 ch,
19. BLO, 4 sl st, 4 sc, 3 hdc, 2 dc inc, 3 hdc, 4 sc, 2 sl st = 24
1 sl st to close, 1 ch,
20. BLO, 4 sl st, 5 sc, 3 hdc, 2 dc, 3 hdc, 5 sc, 2 sl st 24
1 sl st to close, 1 ch,
21. BLO, 4 sl st, 5 sc, 3 hdc, 1 dc inc, 1 dc, 1 dc inc, 3 hdc, 5 sc, 1 sl st = 26
1 sl st to close, 1 ch,
22. BLO; 4 sl st, 4 sc, 4 hdc, 1 dc, 2 dc inc, 1 dc, 4 hdc, 4 sc, 2 sl st = 28
1 sl st to close, 1 ch,
23. BLO, 4 sl st, 4 sc, 4 hdc, 1 dc, 1 inc of tr, 1 tr, 1 inc tr, 1 dc, 4 hdc, 4 sc, 3 sl st = 30
1 sl st, to close, 1 ch,
24. BLO, 4 sl st, 5 sc, 4 hdc, 1 dc, 1 dc inc, 2 tr, 1 dc inc, 1 dc, 4 hdc, 7 sl st = 32
1 sl st to close, 1 ch,
25. BLO, 4 sl st, 24 sc, 4 sl st = 32 stitches
1 sl st to close, 1 ch,
26. Add opaque white, and work sl st around on BLO.
1 sl st to close,
Finish.
– Cut and add 33 strands of 2in of opaque white yarn around the sl stitches. Separating, and fluffing them up. Cut them 1 cm long.
Trim if necessary.
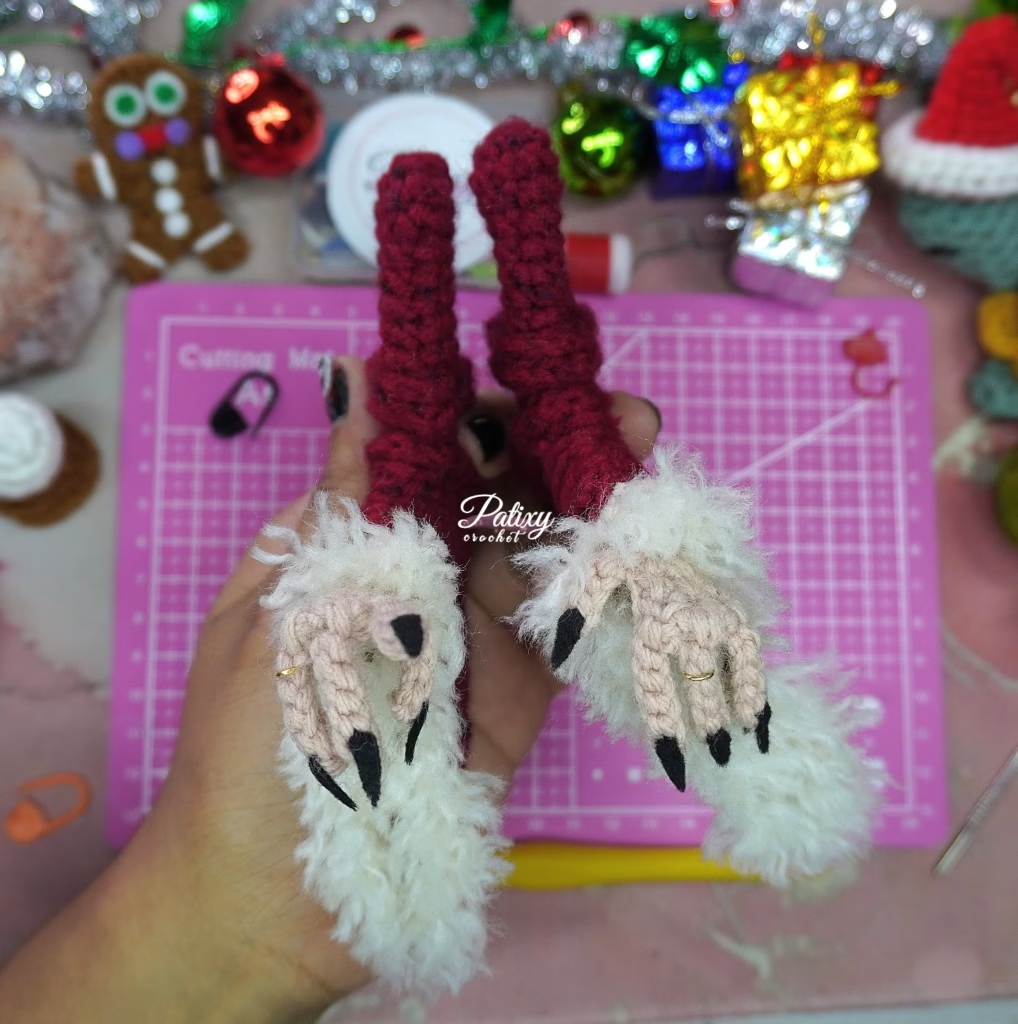
HANDS (2):
– Pale pink and gray yarn, gold rings, black felt
– Pale pink yarn,
3 chain,
1. Make 1 sc in the second chain from the hook, 3 sc in the last chain, and 2 on the other side of the second chain = 6 sc
2 – 4. 6 sc (3 rounds)
5. 1 sc , 1 dec, 1 sc, 1 dec = 4 sc
6-11. 4 sc (6 rounds)
Finish off.
FINGERS (5 on each hand):
(watch Video for details)
– Pale pink,
RIGHT HAND FINGERS;
THUMB – Between rounds 3 and 4 on one side of the hand, add a yarn over with 1 sl st,ch 5, 4 sl st, 1 sl st at the beginning.
INDEX FINGER – 2 sl sts up to rounds 1 and 2 of the hand,ch 6, 5 sl st, 1 sl st on the hand,
MIDDLE FINGER – 1 sl st in the next stitch,ch 6, 5 sl st, 1 sl st on the hand,
RING – 1 sl st in the next stitch,6 ch, 5 sts, 1sl st in the hand
LITTLE FINGER – between rounds 2 and 3, make 1 sl st,ch 5, 4 sl st, 1 sl st on the hand,ch 1 and fasten off.
LEFT HAND FINGERS;
LITTLE FINGER – Between rounds 2 and 3, add yarn with 1 sl st,5 ch, 4 sl st, 1 sl st on hand,
RING FINGER – 1 sl st between rounds 1 and 2 of the hand,6 ch, 5 sl st, 1 sl st on hand,
MIDDLE – 1 sl st in the next stitch,6 ch, 5 sl st, 1 sl st on hand,
INDEX – 1 sl st in the next stitch,6 ch, 5 sl st, 1 sl st on hand,
THUMB – slip stitch down 2 times to rounds 3 and 4,5 ch, 4 sl st, 1 sl st on hand,1 ch and fasten off.
(See YouTube video for details)
– On each finger, add black felt to the second sl st and form the nail.
(See video)
– Add gold rings (3 rings, 2 on the right and 1 on the left) (see video).
– Place the hands inside the sleeves and sew, leaving the palm and fingers outside the sleeve
..………. # 3 ……….
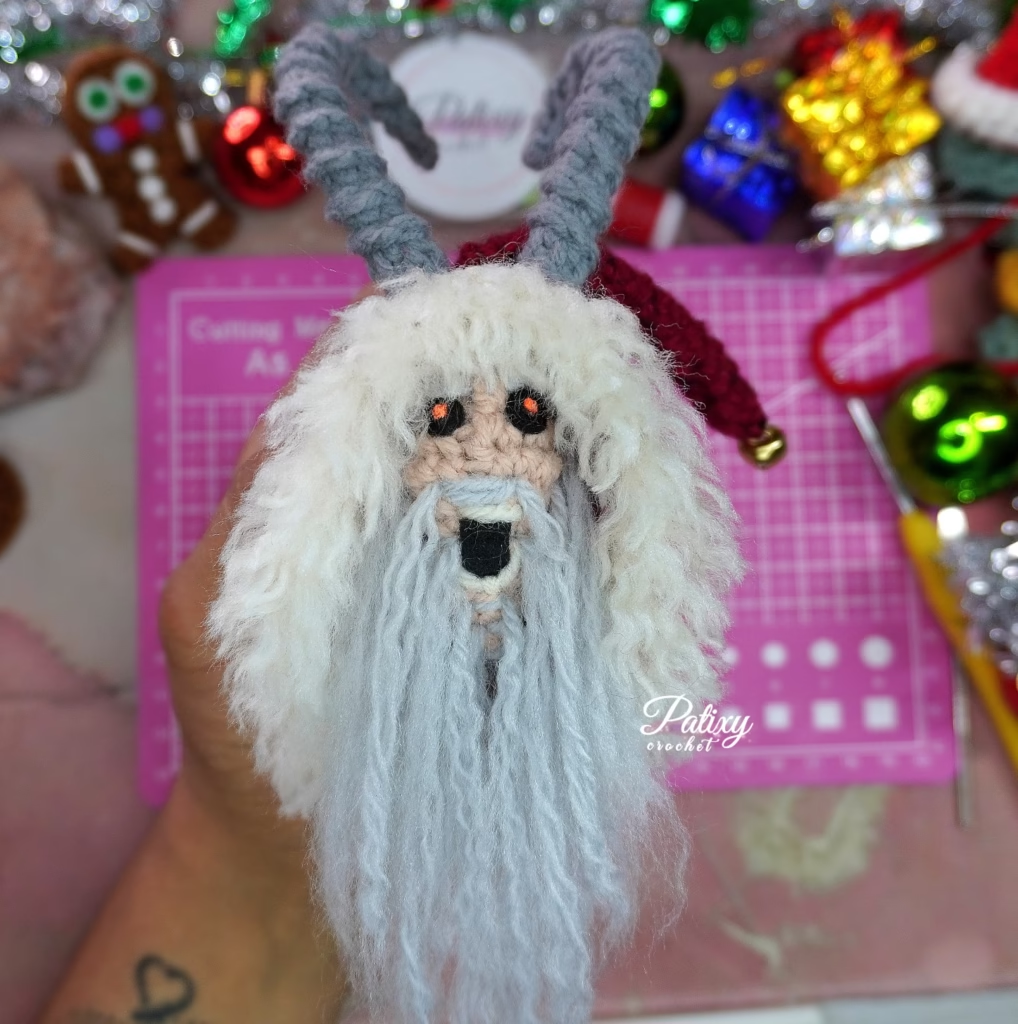
HEAD+HAT+HORNS:
red, opaque white, pale pink, gray, dark gray, black felt and orange.
HEAD:
– Pale pink,
1. 5 sc in a magic ring,
2. 5 inc
3. (1 sc, 1 inc) x 5 = 15 sc
4. 15 sc
5. 5 sc, in blo, 2 sc, 1 hdc, in blo, 2 sc, 5 sc = 15 sc
6. 5 sc, 3 sc together, 1 sc, 1 dc in front post, 1 sc, 3 sc together, 1 sc, 1 dec, 1 dec = 17
7. 2 dec, 2 sc, 3 sc together, 2 sc, 1 sl st in blo, 2 sc, 3 sc together, 1 sc, 1 dec, 1 sc = 18
8. 1 sc, 4 dec, 1 sl st, 4 dec = 10.
Fill well with stuffing.
9. 10 sc
10. 2 sc, 1 dec, 3 sc, 1 dec, 1 sc = 8
11. 3 sc, 1 inc, 1 sc, 1 inc, 2 sc = 10
12. 1 dec, 3 sc, 2 sc in a loop, 1 sc, 1 dec = 8
Stuff all.
13. 4 dec
Fasten off.
EYEBROWS (2): (see video)
-Gray,
LEFT:
Add yarn to the loop under the 8th stitch of round 5 with 1 slip stitch, and 2 slip stitches (one in each loop) of stitches 9 and 10, 1 chain stitch, and cut the yarn and pull it back through a stitch below. (see video)
RIGHT:
Add yarn to the loop under stitch 5 of round 5 with 1 slip stitch, 2 slip stitches in stitches 6 and 7, 1 chain stitch, cut the yarn and pull it back through next round.
Fasten off.
(see video for details)
– Using light gray yarn and a needle, attach the beard, separating the strands. Trim as desired.
– From black felt, make two 7-6 mm circles and two 1 mm circles of orange felt for the irises. Glue them below the eyebrows.
– From black felt, cut a 1.5 cm x 7 mm rectangle, glue it to the mouth area, and embroider the fontanelle with opaque white thread. (See video).
TONGUE:
Pink, 11 ch, 5 sc, 5 sl st, 1 ch,
Finish off.
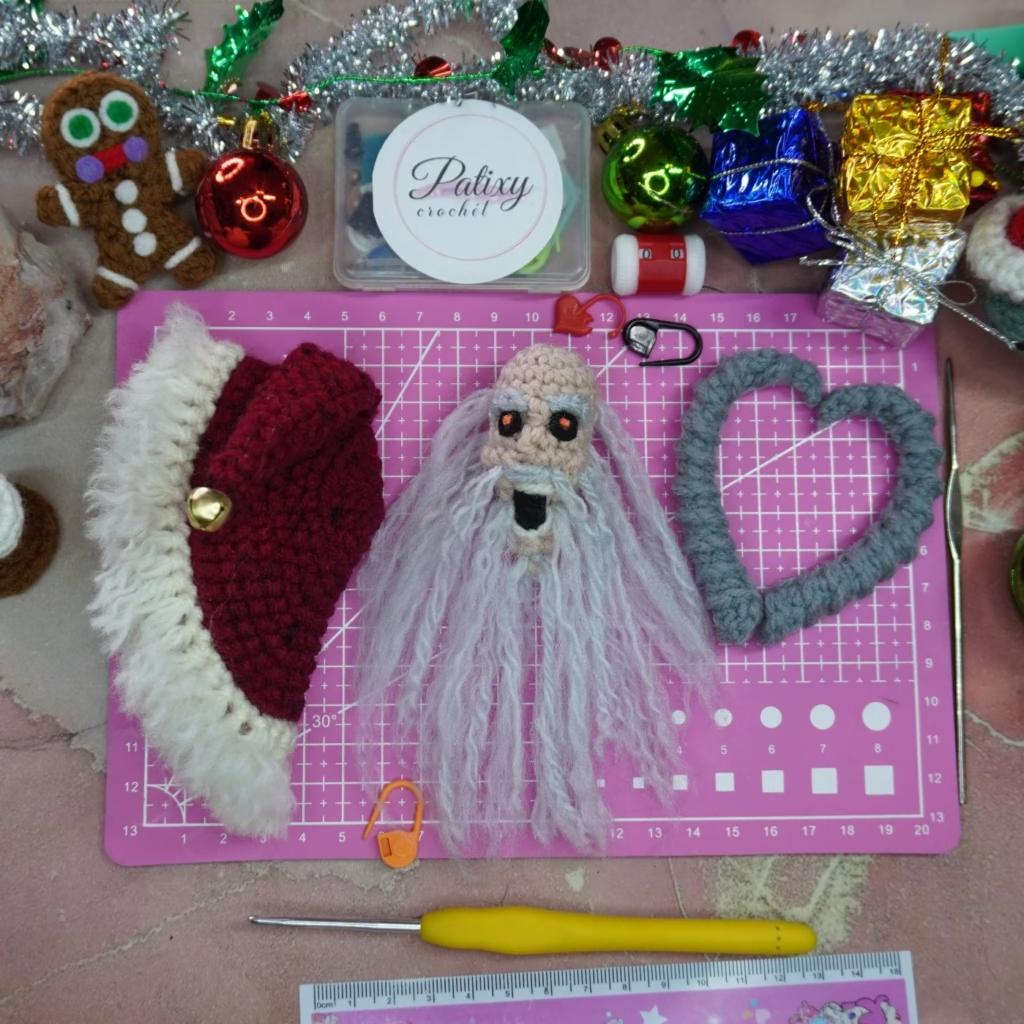
HAT:
– Red Burgundy,
1. 6 sc in a magic ring
2. 6 inc = 12
3. (1 sc, 1 inc) x 6 = 18 sc
4. (2 sc, 1 inc) x 6 = 24 sc
5. In blo; 24 sc
6. (3 sc, 1 inc) x 4, (3 sc, 3 sc together) x 2 = 32 sc
7. 4 sc, 1 inc, 14 sc, 1 inc, 4 sc, 2 inc, 3 sc, 2 inc, 1 sc = 38 sc
8. 9 sc, 1 dec, 3 sc, 1 dec, 13 sc, 1 inc, 3 sc, 1 inc, 4 sc = 38 sc
9. 28 sc, 1 inc, 3 sc, 1 inc, 5 sc = 40
10. 29 sc, 1 inc, 3 sc, 1 inc, 6 sc = 42
11. 9 sc, 1 inc, 3 sc, 1 inc, 16 sc, 1 inc, 3 sc, 1 inc, 7 sc = 46 sc
– Opaque white
12. 46 Sl sts around.
Finish off.
With opaque white; Add 2-inch strands over the slip stitches of row 22, separate and fluff the strands. (See video)
– Sew the head inside the hat.
HAT TIP:
– Burgundy red,
3 sc in a magic ring
2. 1 inc, 2 sc = 4 sc
3. 4 sc
4. 1 inc, 3 sc = 5
5. 1 inc, 4 sc = 6
6. 1 inc, 5 sc = 7
7. 1 inc, 6 sc = 8
8. 1 inc, 7 sc = 9
9 – 13. 5 rounds of 9 sc
Join with 4 sc1 row of 4 sc
Finish off.(See video)
– Attach a jingle bell to the tip of the hat and sew it at the top half way back.
HORNS (2):
– Gray,
1. 5 sc in a magic ring,
2-7. Blo; 5 sc (6 r)
8. blo; dec, 3 sc = 4 sc
9-13. Blo; 4 sc (5 r)
14. 1 dec, 2 sc
15. 3 sc
16. 1 dec, 1 sc1 ch.
Cut a long strand for later.
Make slip stitches in each front loop only.(See video for details)
– Weave the strand through the slip stitches along the horn and pull to form the curve of the horn.
– Finish off and sew over the hat at the front top
….….. # 4 ………
BACK FABRIC:
Burgundy / dark wine,
13 ch,
12 sc for 14 rows.
Fasten off.
CHAINS:
2 chains of 30 in each or 1 chain of 60 in,and 1 chain of 4 in.
ASSEMBLY:(See video)
-Sew the head to the front of the body between rounds 7 and 8. Align it with the knees and legs.
-Attach the sleeves to the sides of the body, between rounds 6 and 7. Align them with the head.(See video)
-Place the back fabric on the upper back of Krampus. Arrange the chains around the body and over the sleeves.(See video)
-Use 2 chains of 30 in and 1 chain of 4 in.Attach the chains around and at the corners of the rectangle.
..…. Part # 5 …….
KRAMPUS TOYS
GINGERBREAD MEN: (2)
– Brown,
1. 8 sc in ch, 1 sl st to close, 1 ch,
2. 1 inc, ch 1, turn,
3. 2 sc, ch 1, turn,
4. 1 sc, 1 inc = 3 sc, ch 1, turn
5. 3 sc,ch 4, turn,3 sc starting in the second ch,
1 sl st in the next st,
ch 4, 3 sc in the ch,
1 sl st in the next st, 2 sl st,
ch 4, 3 sc in the ch,
1 sl st in the next st,
8 inc around the head,
1 sl st in the next st,
ch 4, 3 sc,
1 sl st in the next st,
2 sl st and fasten off.
– Embroider the mouth with red yarn,
– glue both bodies together with slip stitches around.
– Cut out two 1 cm circles and two 5 mm green circles for the eyes.
Glue them to the head.
– Cut out two 5 mm purple circles for the cheeks and glue them to the head.
– Cut out three 5 mm white circles and glue them to the body.
– Embroider white lines around each limb.
Done!
CRYSTAL BALL:
White,
1. 6 sc in a magic ring,
2. 6 inc = 12 sc
3-5. 12 sc
6. 6 dec, Stuff
Brown,
7. 6 inc in BLO = 12 sc
8. 12 sc
Finish off and stuff well.
BASE:
– Brown,
1. 6 sc in magic ring,
2. 6 inc = 12 sc
3. (1 sc, 1 inc) x 6 = 18 sc
4. 18 sl sts around.
Finish off
– Glue or sew the base to the ball.
Done!
TEDDY BEAR:
HEAD:
1.- 6sc in st
2.- 6inc
3.- 12sc
4.- 12sc
5.- 12sc
6.- (1sc, 1dec)x4=8sc
Fill well
7.- (1sc, 1dec)x2, 1sc, 1 dec using the last stitch of this round and the first stitch of round 8.
BODY:
continue
8.- 5 inc
9.-10 sc
10.- (1 sc, 1 inc)x5=15 sc
11.- 15 sc
12.-15 sc
13.- (1 sc, 1 dec)x 5 = 10 sc
Fill well
14.- 10 sc
Cut the yarn, close the circle and finish off.
HANDS (2):
3 ch, 3 hdc in the second ch, 1 st.
sew to the sides of the body under the head.
FEET (2):
4ch,
3hdc in second ch, 1sc, 1sl st
We sew the body from the back.
EARS(2):
3ch,
1sc in sec, 1sl st
-Sew to the head between rows 1 and 3 on each side.
– Embroider a smile with teeth
– Embroider the eyes with white.
– Make a bow with red yarn around the neck.
Done!
BURLAP SACK:
Beige,
12 ch,
1. Starting in the second ch;
10 sc, 3 sc in the last ch,
9 sc on the other side,
2 together in the starting ch.
2-15. 24 sc around
16. ch 3, turn,
24 dc around,
1 sl st to close the round
.Finish off.
STRAPS:
1 sl st in one bottom corner,
approx. 27 ch
1 sl st in the other top corner.
ch 1.
Finish off.
– Repeat on the other side.
Done!
YOU’RE FINISHED!👏
Congratulations!
PROHIBITED: Copying, reproducing, or selling this pattern in whole or in part is not allowed.
ALLOWED: You may sell the finished product in small quantities.
Please credit the designer: @patixy_crochet 🫶
Don’t forget to tag me on social media, using the hashtag #patixycrochetamigurumis We would love to see your creation!
THANKS for your support 😊🫶Have a great day!@patixy_crochet
Email: Patixycrochet@gmail.com
Find more free patterns on my website. Www.patixycrochet.com
🌐 FIND ME ON SOCIAL MEDIA
📩 Have questions?
Feel free to contact me at:
👉 Find more free patterns on my website:
Leave a Reply