
Take your hook and lets crochet Grogu – AMIGURUMI Pattern of Baby Yoda, with video tutorial in Spanish.

Hello!
I am so glad to share this Crochet Pattern of Grogu – Baby Yoda with you, which includes a tutorial on YouTube in Spanish so you can see the process and assemble details.
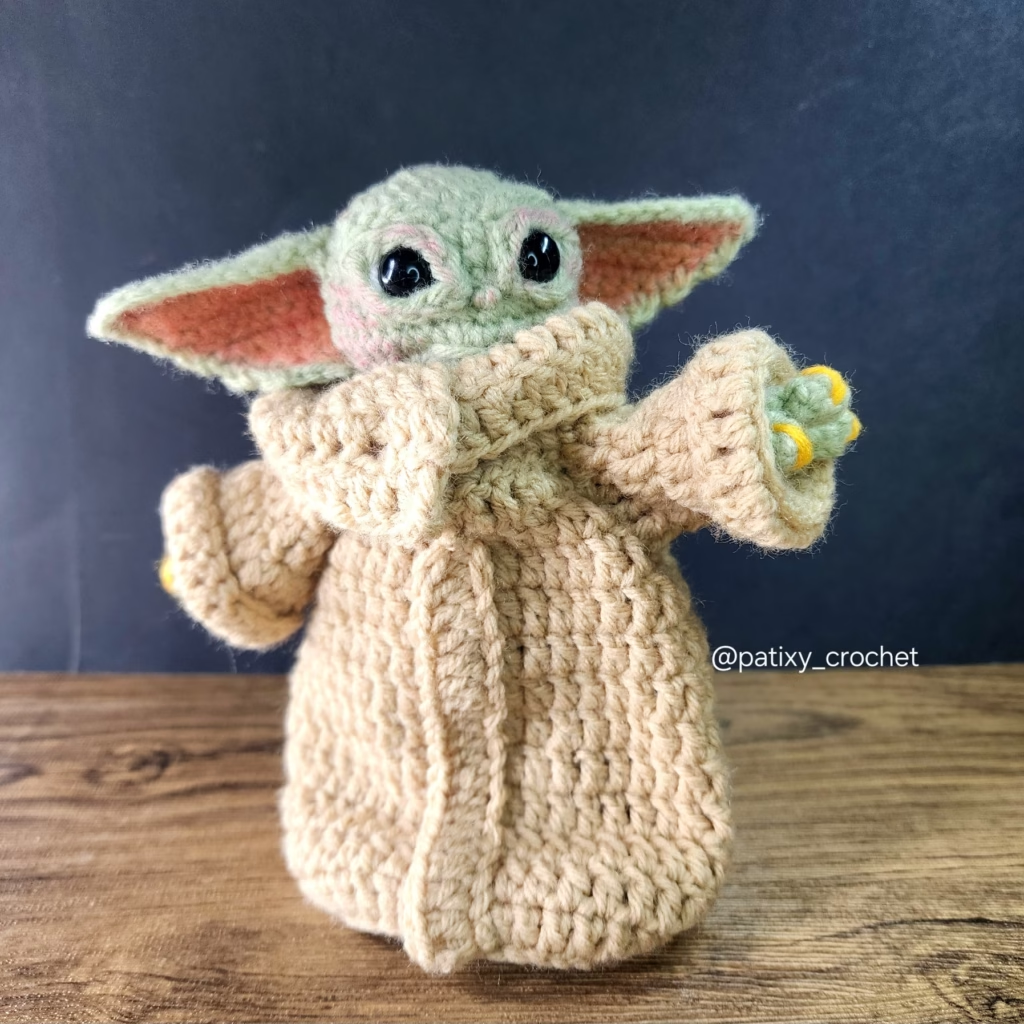
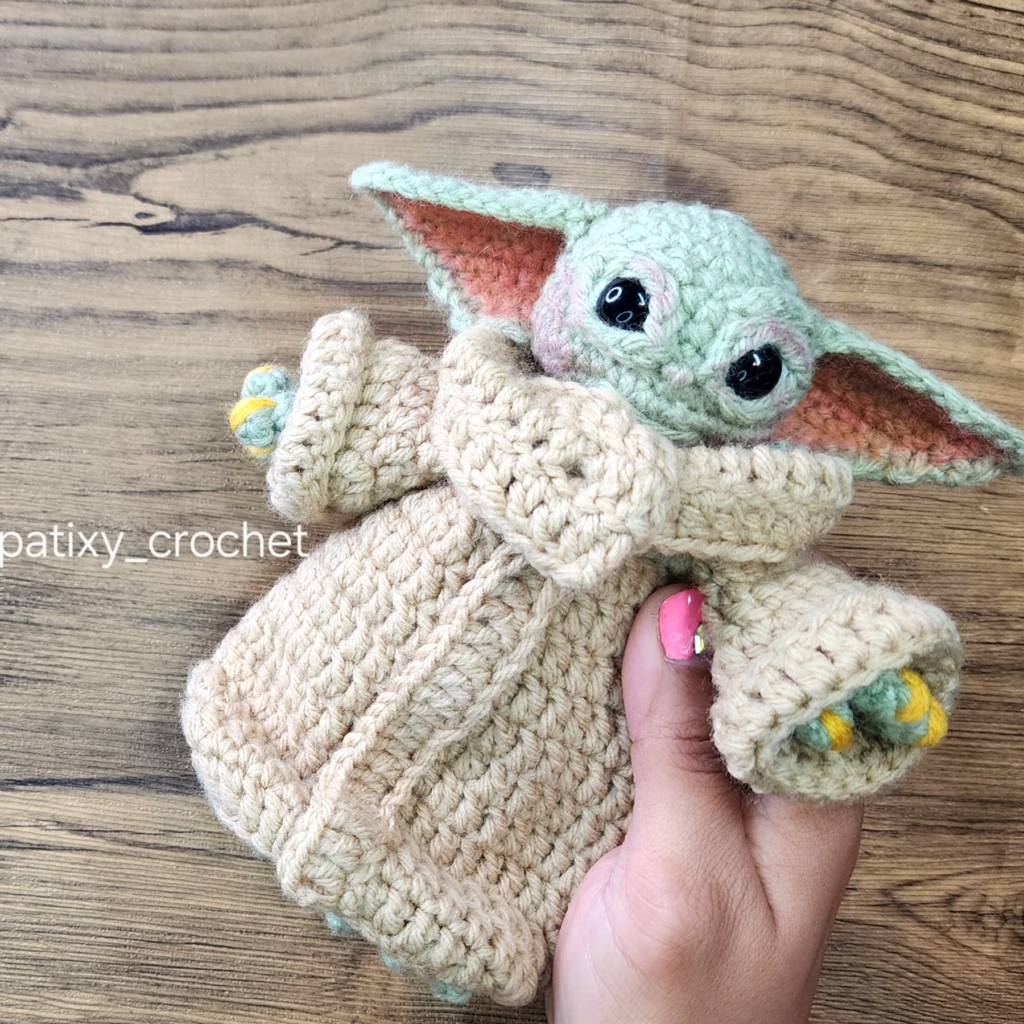

GROGU – BABY YODA
-Eng
@patixy_crochet
Free Pattern – Amigurumi
📺 VIDEO TUTORIAL CONTENT
📌 IMPORTANT INFORMATION
This is a free crochet pattern for personal use.
⚠️For this tutorial you will need to know some of the basic crochet stitches:
MR = magic ring
ch = chain
sc = single crochet
sl st = slip stitch
hdc = half double crochet
dc = double crochet
tr = treble crochet
dtr = double treble crochet
inc = increase
dec = decrease
BLO = back loop only
FLO = front loop only
Puff = Puff stitch
MEASUREMENTS:
7 IN, 18 CM tall.
MATERIALS:
#4mm Yarn (acrylic): (Frosty Green, buff beige, white, yellow)
2.75mm crochet hook
Needle
Scissors
Pins
Separators-Markers
Safety Eyes – 12 mm
Stuffing
Optional: 24 gauge wirePaint/pastels/makeup to paint the inner part of the ears.
PART #1
HEAD:
Frosty Green, White
Rnd1.- 6 sc in mg
R2.- 6 inc = 12 sc
R3.- (1 sc, 1 inc)x6 = 18 sc
R4.- (2 sc, 1 inc)x6 = 24 sc
R5.- (3 sc, 1 inc)x6 = 30 sc
R6-8.- 30 sc(3r)
R9.- 13 sc, 5 inc, 1 dec, 5 inc, 5 sc = 39 sc
R10.- 13 sc, 1 dec, 8 sc, 2 inc, 8 sc, 1 dec, 4 sc = 39 sc
R11.- (1 sc, 1 dec)x5, 4 dec, 1 sc, 1 inc, 1 sc, 5 dec, 1 sc, 1 dec = 25 sc
R12 – 8 dec, 1 inc, 4 dec = 14 sc
R13 – 14 sc
*Place the eyes and fill:
*EYES (2):
12 mm safety eyes,
place between rows 7 and 8, in stitch #16, and place the other one, approximately 5 sts apart, in stitch #21 .
R14 – 7 dec = 7 sc
Cut and Fasten Off
EYELIDS (2):
Frosty Green
– 6 ch, 1 st in the second ch from the hook, 5 ch, 1 st in the first ch,
Cut and fasten off.
EYEBROWS (2):
Frosty Green
5 ch
Cut and Fasten Off.
EARS (2):
Frosty Green
Crochet in rows:
12 ch,
*optional: Crochet row #1 together with 24 gauge wire, approximately 10-13 cm (see video)
Row1: 1 sc in the second ch from the hook, 10 sc = 11 sc
Row2: 1 ch, turn, 9 sc, 1 dec = 10 sc
R3: 1 ch, turn, 1 dec, 8 sc = 9 sc
4: 1 ch, turn, 7 sc, 1 dec = 8 sc
5: 1 ch, turn, 1 dec, 6 sc = 7 sc
6: 1 ch, turn, 5 sc, 1 dec = 6 sc
7: 1 ch, turn, 1 dec , 4 sc = 5 sc
8: Ch 1, turn, 3 sc, 1 dec = 4 sc
9: Ch 1, turn, 1 dec, 2 sc = 3 sc
Cut and Fasten Off.
Paint.
—– EMBROIDERY AND ASSEMBLY —–
NOSE: Embroider the nose between the eyes using a 2-stitch pattern, making 2 rows side by side and then 7 rows vertically, rolling the strands to form the nose (see video)
—OUTLINE the eyes with white. Stitch the EYELIDS on each eye (see video)
MOUTH: Make slits for the mouth between rows 11-12. Embroider a line for the mouth. (see video)
Ears: between rows #5 and 6 with 2 stitches separating the eye, 2 rows below and 4 rows below (see video)
Paint with makeup, acrylic paint, or peach-colored chalk pastels inside each ear. (See video)
— Assemble the head — see video for details —
PART #2
FEET (2):
(Frosty Green)
R1: 6 sc in a mg
R2: 6 inc = 12 sc
R3: (1 sc, 1 inc) x 6 = 18 sc
R4: 18 sc in BLO (on back loop only)
R5: (2 sc, 1 dec) x 4, 2 sc = 14 sc
R6: 4 sc, 4 dec, 2 sc = 10 sc
R7-11: 10 sc (5 rows)R1
2: 3 sc, 1 inc, (2 sc, 1 inc) x 2 = 13 sc
R13: 13 sc
Cut and Fasten Off.
BODY:
Frosty Green(video)
Add yarn with 1 slst on the right foot, ch 2,
Rnd1: Take the left foot and crochet 13 sc, 2 sc in the front loops of the starting chains, move to the right foot and crochet 13 sc, and 2 sc in the loops of the chains = 30 sc
R2: 13 sc, 2 inc, 15 sc = 32 sc
R3: 32 sc
R4: (6 sc, 1 dec) x 4 = 28 sc
R5-8: 28 sc (4 rows)
*Optional: place wire inside the body for support. Fill out…
R9.- (5 sc, 1 dec)x4 = 24 sc
10.- 24 sc
11.- (4 sc, 1 dec)x4 = 20 sc
R12.- 20 sc
13.- (3 sc, 1 dec)x4 = 16 sc
14.- 16 sc
15.- (2 sc, 1 dec)x4 = 12 sc
16.- 12 sc
Stuff (video)
17.- 6 dec
18-23.- 6 sc (6r)
24.- 3 dec
Cut and finish.
FINGERS (12):
Frosty Green, yellow
1 rnd- 4 sc in a mg,
2 r – 4 sc.
3 r – 4 sc
Fasten off.
HANDS (2):
Frosty Green
We use 3 fingers for each arm:
R1 – 1 slst in a finger and ch 1 and 1 sc on the same st, 1 sc in the next stitch, then without fastening off, we crochet; 2 sc in other finger, then 4 sc on last finger, turn and 2 sc on the other side of the fingers = 12 sc (see video)
R2 – 12 sc
R3 – 6 dec
R4-10 – 6 sc
We make one more stitch and then crochet 3 sc from side to side to close the arm.
We cut and leave enough yarn to sew to the body.
*We sew the arms to the body, on row 14.
*We embroider yellow yarn on the 3 fingers of each hand to create the nails.
And that’s it, we fasten off and hide the yarns.……
Toes (6):
Frosty Green
3 toes for each foot (2):
We hook a yarn over a toe with 1 slip stitch and crochet 2 slip stitches on each toe. (Video)
We fasten off and now we sew the 3 toes together at the foot, on the front side. (Video)
We do the same with the other foot.
We fasten off and hide the yarns.
Fingernails*
*We finish the body details.
CLOTHING:
Buff beige
Ch 39, and 1 slst in the first ch.
1.- Work up with 2 ch and work 39 dc around and 1 slst to close
Rnd 2-10.- Ch 2, 39 dc, 1 slst to close.
11.- 2 ch, 39 dc
12.- 2 ch, turn, 7 dc, 4 ch, skip 6 dc, and 13 dc, 4 ch, skip 6 dc, and crochet 7 dc.
13.- 2 ch, turn and 35 dc
14.- 2 ch, turn, – in BLO (1 inc, 33 dc, 1 inc) = 37 dc
15.- 2 ch, turn, 36 dc, 1 inc = 38 dc
16.- 2 ch, 1 inc, 37 dc = 39 dc
Cut and Fasten Off.
SLEEVES (2):
(Buff being)
Add yarn with 1 slst and 2 ch, 1 dc in the next , 14 dc = 15 dc
R2: 3 ch, 15 dc, 1 slst
R3: 3 ch, 2 dc, 1 inc, (3 dc, 1 inc) x 3, 1 slst to close = 19 dc
R4: 3 ch, 19 dc, 1 slst
R5: 3 ch, in FLO, 19 dc, 1 slst
Cut and fasten off.
*Do the same with the other sleeve and you’re done.
BINDING:
Buff beige
22 ch,1 dc in the third ch, and 19 dc.
Sew to the front of the clothes.
*Sew a button onto the collar.
*Attach the head to the body.
Dress up!
And that’s it!
— Watch the video for details.
Congratulations! You’re done! 👏
Please do NOT copy or sell this pattern. It is protected by the international copyright law.
You CAN sell your final product in small quantities, just give me a mention @patixy_crochet 🫶.
Don’t forget to tag me on social media, using the hashtag #patixycrochetamigurumis I would love to see your creation!
THANKS for your support 😊
🫶Have a great day!
@patixy_crochet
🌐 FIND ME ON SOCIAL MEDIA
📩 Have questions?
Feel free to contact me at:
👉 Find more free patterns on my website:
Leave a Reply