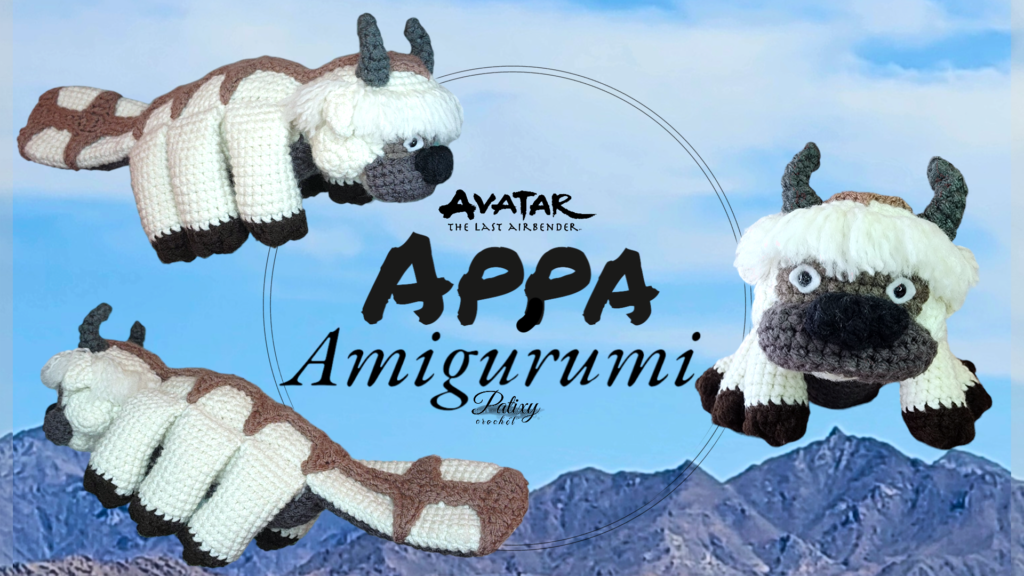
I am so happy to share this APPA – Amigurumi Pattern from Avatar the Last Airbender written in English with video tutorial in Spanish.
Hello!
Here you have APPA – Amigurumi Pattern with you, which includes a tutorial on YouTube (2 parts) so you can see the process and assemble details.
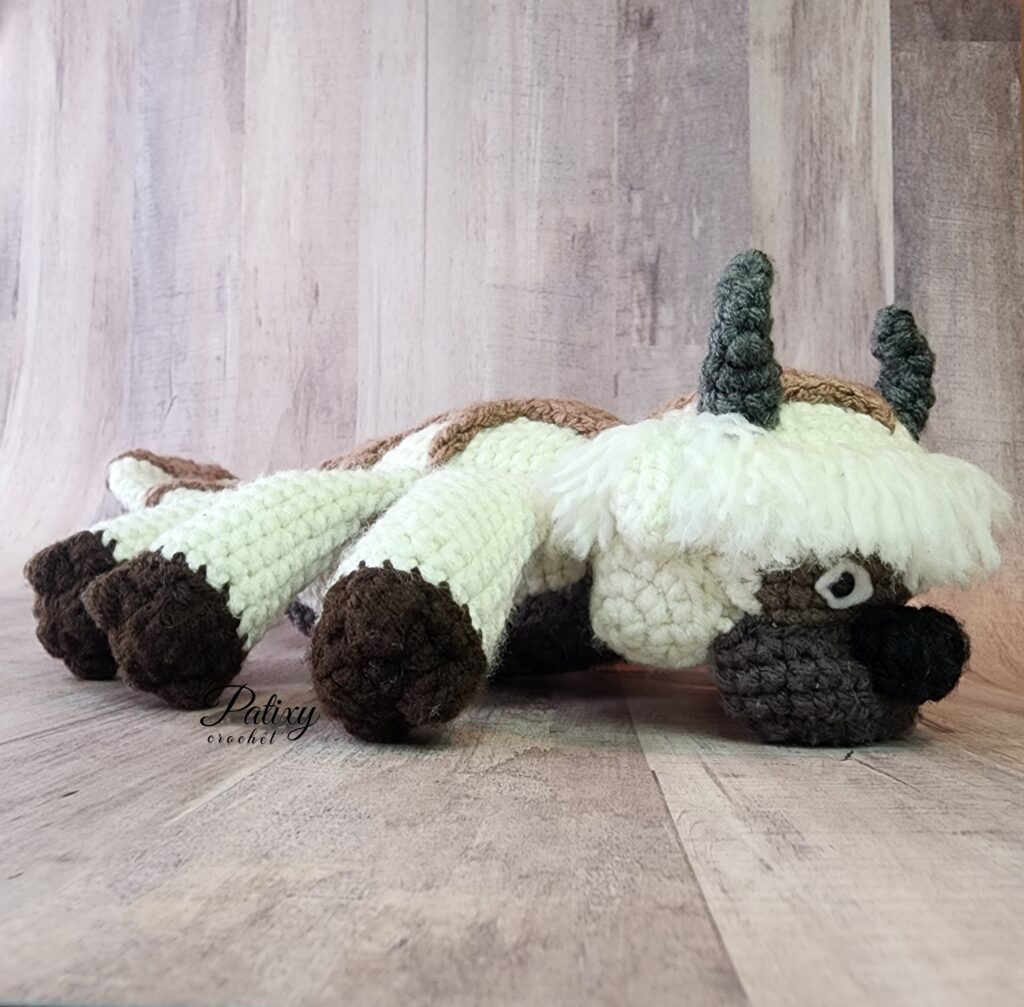

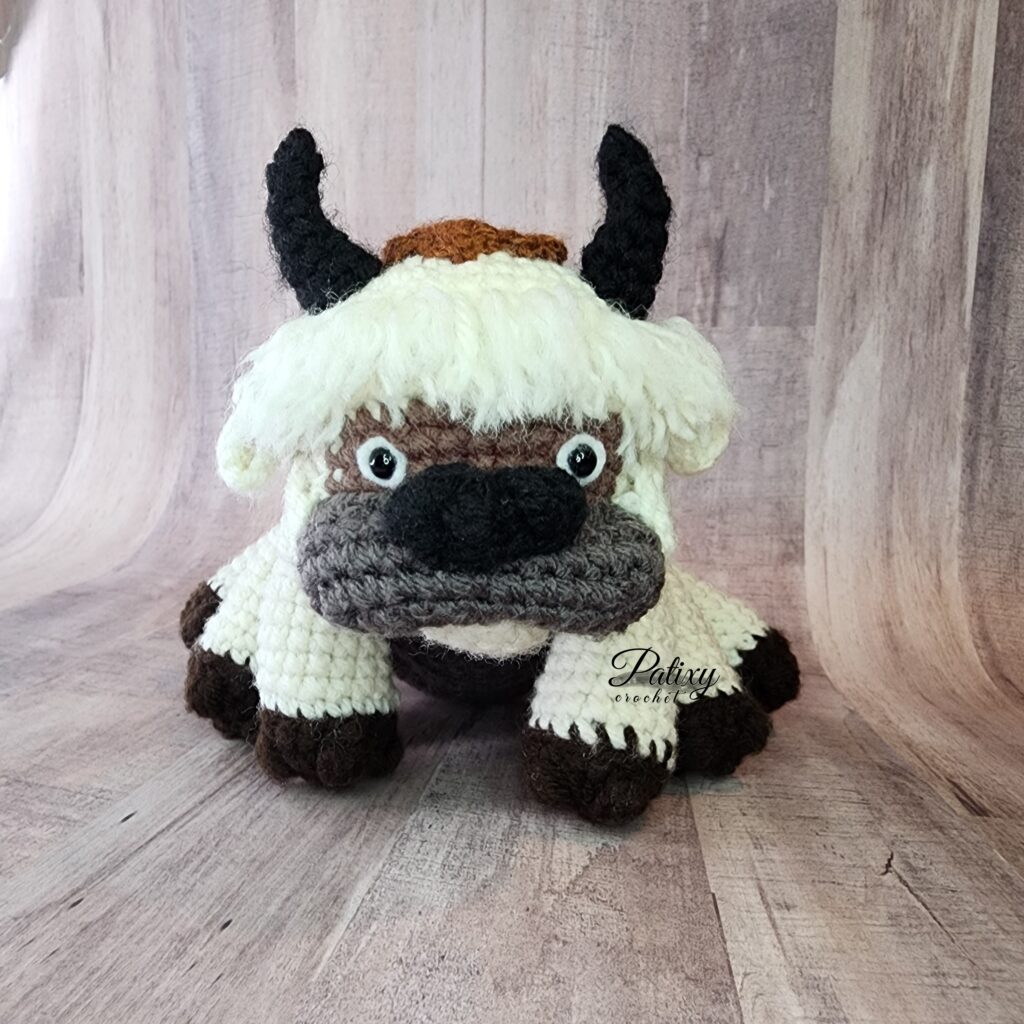
APPA – Amigurumi
AVATAR THE LAST AIRBENDER
@patixy_crochet
Free Pattern – Amigurumi
For this tutorial, you’ll need to watch the video tutorials for visual details:
📌 IMPORTANT INFORMATION
This is a free crochet pattern for personal use.
⚠️ For this tutorial, you will need to know some of the basic crochet stitches:
Puff Stitch = puff
Magic Ring = MR
Chain = ch
Slip Stitch = sl st
Single Crochet = sc
Half Double Crochet = hdc
Double Crochet = dc
Treble Crochet = tr
Increase = inc
Decrease = dec
Back Loop Only = BLO
Front Loop Only = FLO
🖤 MATERIALS
#4 Medium Weight Acrylic Yarn:
- Off White
- Black
- Dark Taupe
- Graffiti
- Charcoal
- Dark Chocolate Brown
- Brown (Coffee)
📏 Approximate Size:
- Length: 12 in / 30.5 cm
- Width: 9 in / 23 cm (with the legs extended)
👉 (Watch video for visual details)
🖤 HEAD
✨ Off White
Rnd 1. 8 sc in a magic ring = 8 sts
Rnd 2. 8 inc = 16 sts
Rnd 3. (1 sc, 1 inc) ×8 = 24 sts
Rnd 4. (2 sc, 1 inc) ×8 = 32 sts
Rnd 5. (3 sc, 1 inc) ×8 = 40 sts
Rnd 6-10. 40 sc = 40 sts
👉 Changing colors
Rnd 11-15. 13 sc (dark taupe), 27 sc (off white) = 40 sts
💡 Place the white felt behind the eyes and attach them to the Dark Taupe section. Watch the video for more details.
Rnd 16. (2 sc, 1 dec) ×10 = 30 sts
Rnd 17. (1 sc, 1 dec) ×10 = 20 sts
Rnd 18. 10 dec = 10 sts
👉 Close.
🖤 NOSE
✨ Black
In a magic ring.
Rnd 1. Ch 3, 2 tr, 1 hdc, 1 tr, 1 hdc, 2 tr, Ch 3, 1 sl st to close.
🖤 UPPER LIP
✨ Graffiti
Base. Ch 10 + Ch 1 to turn = 11 ch
Rnd 1. 2 sc in the second ch from the hook, 8 sc, 4 sc in the last ch, turn, 8 sc along the opposite side, 2 sc in the last ch = 24 sts
Rnd 2. 2 inc, 8 sc, 4 inc, turn, 8 sc, 2 inc = 32 sts
Rnd 3. 32 sc = 32 sts
Rnd 4. 20 sc, 8 sc through both sides, 5 sc, 1 sl st in the next stitch = 33 sts
💡 Watch the video for more details.
👉 Mark the stitches as follows: 9, 7, 9, 7.
👉 Stuff the two small openings.
🖤 LOWER LIP
✨ Off White
In a magic ring.
Rnd 1. 3 sc = 3 sts
Rnd 2. Ch 1, turn, 3 inc = 6 sts
Rnd 3. Ch 1, turn, (1 sc, 1 inc) ×3 = 9 sts
Rnd 4. Ch 1, turn, 9 sc = 9 sts
👉 Fasten off.
🖤 EARS (2)
✨ Off White
In a magic ring.
Rnd 1. 4 sc = 4 sts
Rnd 2. 4 inc = 8 sts
Rnd 3. (1 sc, 1 inc) ×4 = 12 sts
1 sl st in the second sc.
👉 Fasten off.
🖤 CHEEKS (2)
✨ Off White
Rnd 1. 6 sc in a magic ring = 6 sts
Rnd 2. 6 inc = 12 sts
Rnd 3. (1 sc, 1 inc) ×6 = 18 sts
👉 Fasten off.
🖤 HORNS (2)
✨ Charcoal
💡 Leave a long tail from the magic ring to shape the horn. Watch the video for more details.
In a magic ring.
Rnd 1. 3 sc = 3 sts
Rnd 2. 3 sc = 3 sts
Rnd 3. 1 sc, 1 inc, 1 sc = 4 sts
Rnd 4. 4 sc = 4 sts
Rnd 5. 1 sc, 1 inc, 1 sc, 1 inc = 6 sts
Rnd 6. 6 sc = 6 sts
Rnd 7. 1 sc, 1 inc, 1 sc, 1 inc, 1 sc, 1 inc = 9 sts
👉 Fasten off.
👉 Shape the horn.
🖤 ASSEMBLE THE HEAD
💡 Watch the video for the assembly details.
🖤 BODY
✨ Off White
In a magic ring.
Rnd 1. 8 sc = 8 sts
Rnd 2. 8 inc = 16 sts
Rnd 3. (1 sc, 1 inc) ×8 = 24 sts
Rnd 4. (2 sc, 1 inc) ×8 = 32 sts
Rnd 5-6. 32 sc = 32 sts
Rnd 7. 31 sc, 1 inc = 33 sts
Rnd 8. 11 sc, 1 inc, 3 sc, 1 inc, 3 sc, 1 inc, 3 sc, 1 inc, 9 sc = 37 sts
Rnd 9. 16 sc, 1 inc, 5 sc, 1 inc, 14 sc = 39 sts
Rnd 10. 17 sc, 1 inc, 6 sc, 1 inc, 14 sc = 41 sts
Rnd 11. 41 sc = 41 sts
Rnd 12. 41 sc = 41 sts
Rnd 13. 41 sc = 41 sts
Rnd 14. 17 sc, 1 dec, 6 sc, 1 dec, 14 sc = 39 sts
Rnd 15. 39 sc = 39 sts
Rnd 16. 17 sc, 1 dec, 5 sc, 1 dec, 13 sc = 37 sts
Rnd 17. 37 sc = 37 sts
Rnd 18. 12 sc, 1 dec, 4 sc, 1 dec, 4 sc, 1 dec, 11 sc = 34 sts
Rnd 19. 34 sc = 34 sts
Rnd 20. 15 sc, 1 inc, 1 sc, 1 inc, 2 sc, 1 inc, 1 sc, 1 inc, 11 sc = 38 sts
Rnd 21. 38 sc = 38 sts
Rnd 22. 38 sc = 38 sts
Rnd 23. 15 sc, 1 dec, 1 sc, 1 dec, 2 sc, 1 dec, 1 sc, 1 dec, 11 sc = 34 sts
Rnd 24. 16 sc, 1 inc, 1 sc, 1 inc, 2 sc, 1 inc, 12 sc = 37 sts
Rnd 25. 35 sc, 1 dec = 36 sts
Rnd 26. 6 sc, 1 dec, 28 sc = 35 sts
Rnd 27. 35 sc = 35 sts
Rnd 28. 35 sc = 35 sts
Rnd 29. 17 dec = 17 sts
👉 Stuff the body.
Rnd 30. 9 dec
👉 Close.
🖤 LEGS (6)
✨ dark chocolate and off white
Rnd 1. 4 sc in a magic ring (dark chocolate) = 4 sts
Rnd 2. 4 inc = 8 sts
Rnd 3. 1 sc, 1 inc, 1 puff, ch 1, 1 inc, 1 puff, ch 1, 1 inc, 1 puff, ch 1, 1 inc, 1 sl st to close = 12 sts + 3 ch
👉 Change to off white
Rnd 4. 14 sc, 1 inc = 16 sts
Rnd 5–16. 16 sc = 16 sts (12 rounds)
Rnd 17. 2 sc, 8 sc working through both sides
👉 Fasten off
🖤 TAIL
✨ off white
👉 Worked in rows
👉 Base
Ch 5
Rnd 1. 2 sc in the second ch from the hook, 2 sc, 4 sc in the last ch, turn, 2 sc, 2 sc in the last ch = 12 sts
Rnd 2. 2 inc, 2 sc, 4 inc, 2 sc, 2 inc = 20 sts
Rnd 3. (1 sc, 1 inc) ×2, 2 sc, (1 sc, 1 inc) ×4, 2 sc, (1 sc, 1 inc) ×2 = 28 sts
Rnd 4–7. 28 sc = 28 sts
Rnd 8. 1 sc, 1 dec, 12 sc, 1 dec, 11 sc = 26 sts
Rnd 9–13. 26 sc = 26 sts
Rnd 14. 14 sc, 1 dec, 10 sc = 25 sts
Rnd 15. 2 sc, 1 dec, 21 sc = 24 sts
Rnd 16. 24 sc = 24 sts
Rnd 17. 24 sc = 24 sts
Rnd 18. 2 sc, 1 dec, 20 sc = 23 sts
Rnd 19. 23 sc = 23 sts
Rnd 20. 23 sc = 23 sts
Rnd 21–23. 23 sc = 23 sts
Rnd 24. 1 sc to even out, then join both sides with 11 sc, closing the opening
🖤 BELLY
✨ graffiti
👉 Worked in rows
👉 Base
Ch 10 + Ch 1 to turn = 11 ch
Rnd 1. 1 sc in the second ch from the hook, 9 sc = 10 sts
Rnd 2–22. Ch 1, turn, 10 sc = 10 sts
Rnd 23. Ch 1, turn, 1 dec, 6 sc, 1 dec = 8 sts
Rnd 24–38. Ch 1, turn, 8 sc = 8 sts (15 rows)
Rnd 39. Ch 1, turn, 1 inc, 6 sc, 1 inc = 10 sts
Rnd 40–44. Ch 1, turn, 10 sc = 10 sts (5 rows)
Rnd 45. Ch 1, turn, 1 dec, 6 sc, 1 dec = 8 sts
👉 Work a round of slip stitches around the edge of the piece. Watch the video for more details.
👉 Fasten off
🖤 ARROWS
✨ Brown
Base. Ch 2.
Worked in rows.
Rnd 1. 3 sc in the second ch from the hook = 3 sts
Rnd 2. Ch 1, turn, 3 inc = 6 sts
Rnd 3. Ch 1, turn, 6 sc = 6 sts
Rnd 4. Ch 1, turn, 2 sl st, Ch 1, 2 sc = 2 sts
Rnd 5. Ch 1, turn, 2 sc = 2 sts
👉 Continue working until you have completed 49 rows, counting from Rnd 4 (52 rows total).
🖤 ARROWHEADS
💡 Watch the video for the assembly details.
1. Ch 6, 1 sl st in the second ch from the hook, 1 sc, 1 hdc, 2 dc, 1 sl st in the third row, 5 sl st across the piece.
2. Ch 6, 1 sl st in the second ch from the hook, 1 sc, 1 hdc, 2 dc, 1 sl st in the third row, 7 sl st across the piece.
3. Ch 5, 1 sl st in the second ch from the hook, 1 sc, 1 hdc, 1 dc, 1 sl st in the third row, 4 sl st across the piece.
4. Ch 6, 1 sl st in the second ch from the hook, 1 sc, 1 hdc, 2 dc, 1 sl st in the third row, 4 sl st across the piece.
5. Ch 6, 1 sl st in the second ch from the hook, 1 sc, 1 hdc, 2 dc, 1 sl st in the third row, 13 sl st across the piece.
👉 Work 3 sl st across the piece, Ch 1, 1 sl st, 3 sl st, Ch 1, 1 sl st in the last sl st, 3 sl st, Ch 1, 1 sl st, 3 sl st.
💡 Watch the video for more details.
🖤 ARROWHEADS (OTHER SIDE)
👉 Work back along the other side with 14 sl st.
1. Ch 6, 1 sl st in the second ch from the hook, 1 sc, 1 hdc, 2 dc, 1 sl st in the third row, 4 sl st across the piece.
2. Ch 6, 1 sl st in the second ch from the hook, 1 sc, 1 hdc, 2 dc, 1 sl st in the third row, 4 sl st across the piece.
3. Ch 5, 1 sl st in the second ch from the hook, 1 sc, 1 hdc, 1 dc, 1 sl st in the third row, 7 sl st across the piece.
4. Ch 6, 1 sl st in the second ch from the hook, 1 sc, 1 hdc, 2 dc, 1 sl st in the third row, 5 sl st across the piece.
5. Ch 6, 1 sl st in the second ch from the hook, 1 sc, 1 hdc, 2 dc, 1 sl st in the third row, in the last stitch.
👉 Fasten off.
🖤 ASSEMBLY
💡 Attach all the pieces. Watch the video for the assembly details
👉 watch the video for how to Assemble the body!
CONGRATULATIONS! You are done! 👏
Please do NOT copy or sell this pattern.
You CAN sell your final product.
Don’t forget to tag me, I would love to see your amigurumi done!
THANKS for your support 😊🫶
@patixy_crochet
Most popular patterns
🌐 FIND ME ON SOCIAL MEDIA
📩 Have questions?
Feel free to contact me at:
Patixycrochet@patixycrochet.com
👉 Find more free patterns on my website:
Looking for more creatures? 🖤
Explore premium crochet patterns with exclusive designs.


Leave a Reply